Hi there, dear reader.
I moved all my blogs under one address. Please visit my new blog at www.havatopraksu.org/blog
Please use the search function to find the articles.
Hi there, dear reader.
I moved all my blogs under one address. Please visit my new blog at www.havatopraksu.org/blog
Please use the search function to find the articles.
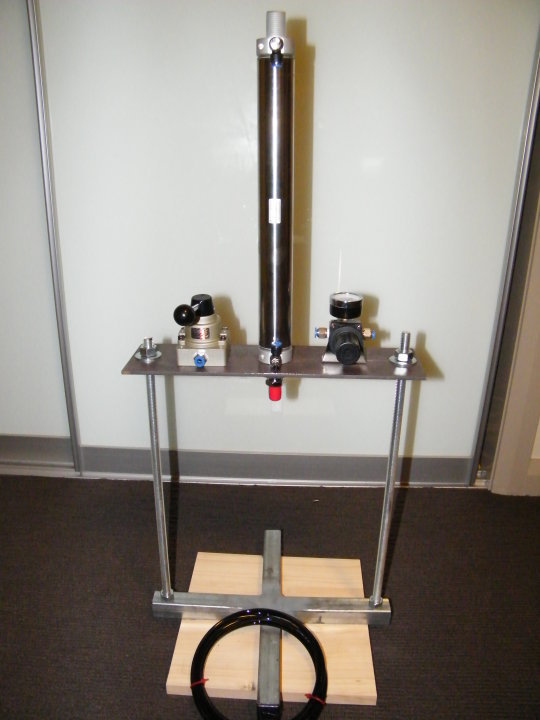
When I built my first cheese press, I noticed that the cheese I was making ending up drier than it should have been. Obviously, with the pneumatic cylinder and calculations I used, I was applying too much pressure on the follower. Then I discovered the Tomme style cheeses with its moderate acidity and pressing equal to its weight. It was an enlightenment for me and returning back to fundamentals moment. I tried many hard cheeses at home and settled on Tomme style as it requires not much pressing and easy to make in our busy family life.
 For a hard cheese to ripen properly, it needs to have certain moisture in it and the cave should have so much humidity that the released moisture from the cheese can be slow.
Well, moisture control starts with the FLOC, from the moment rennet hits the milk till you cut and eat it. Flocculation being the start of moisture control, cooking, milling if required, pressing, drying, salting and aging stages requires understanding of the moisture control.
If you don’t want to end up with a rock-cheese, there are steps (and devices) you need to adhere. As I said before flocculation method is your start point. Higher the floc time gives you more moisture in the curd. Lower floc times, you will get less moisture in the cheese. As we do not want high initial moisture in the hard cheeses, their floc multiplier usually 3 to 4 but like Camembert with lots of moisture in the curd is 6.
Of course the curd cutting size also matters here. Smaller pieces will have more surface area to release the whey in them. The look and feel of the cooked curds will tell you the pH and moisture left in them. Usually recipes talk about springy, sticky, shiny, shrunk curd while they are explaining the recipe.
Once the curd cut and the cooking starts, acidity also increases (pH drops). The stirring here is the way to keep the curds as a single piece as they are cut. If you don’t stir, they will gather at the bottom, stick together and ruin the end product. Continues stirring, letting them loose whey till they reach to the shrunk, shiny, springy look and feel. At this moment, they are ready to transfer to baskets and press.
Once they are in the baskets let them sit for about 5 minutes so that they settle and stick together. Add more curds to the baskets to fill in the spaces and make sure the outer edges filled nicely. Measure roughly the weight of the curd. Apply like quarter of its weight as a pressure. If we apply the entire weight as the pressure, the outer edge of the cheese will lose the whey and form a barrier for the inner pieces. Inside of the cheese will stay moist because the whey has nowhere to go. This may lead to further problems during the maturation. Also the holes on your basket is another determining factor. It is artisan cheesemaker’s job to find the equilibrium between the weights of the press, correct basket holes, time to press and flipping intervals.
Increase the weight gradually at 1 hour intervals and flip the cheese at 15 minutes intervals. This will make sure both sides of the cheese is smooth, lost moisture from both sides equally and the future rind that will protect the cheese is developing correctly. Try not to pierce the rind and make sure the cloth peels away without tearing the rind. The rind is the first defence against the bacteria and other contaminants.
At the end of the pressing, the cheese is now ready to be salted. Salting again is an exchange of moisture with salt. Salting helps the aroma to develop and protects the cheese. I always do saturated brine salting and I think it is the most cost effective method for home cheesemaking. The industry standard is 4 to 6 hours per 500g of cheese. I never throw away my brine may be boiling it from time to time and top it up with salt. Cheese swims in this brine flipped regularly. I also sprinkle salt on top of the cheese where the brine doesn’t cover for a protective measure.
The brine infuses into the cheese replacing bit of moisture with salt. The rind is developing at this stage and already thickened. Initial drying of the cheese happens in room temperature. I remove the cheese and position on top of a clean wooden cutting board, with a tray underneath to catch the salty whey coming out. I also use an umbrella fly screen that we use at picnics so that it is free of things flying in the air. Once it is dry to touch that is when you poke the cheese you should have a bit of shiny oil at your fingertip and visible moisture; it is ready to go into the cave AKA refrigerator with an external thermostat and a wet towel inside.
 Cheese dries on the outside with a considerable moisture inside. It’s a living, breathing thing and it needs time to serve you that beautiful aroma and texture. It needs to release the moisture slowly over a long period, the starter bacteria inside the cheese dies releasing the crucial aroma compounds when the moisture levels dropped under a certain level.
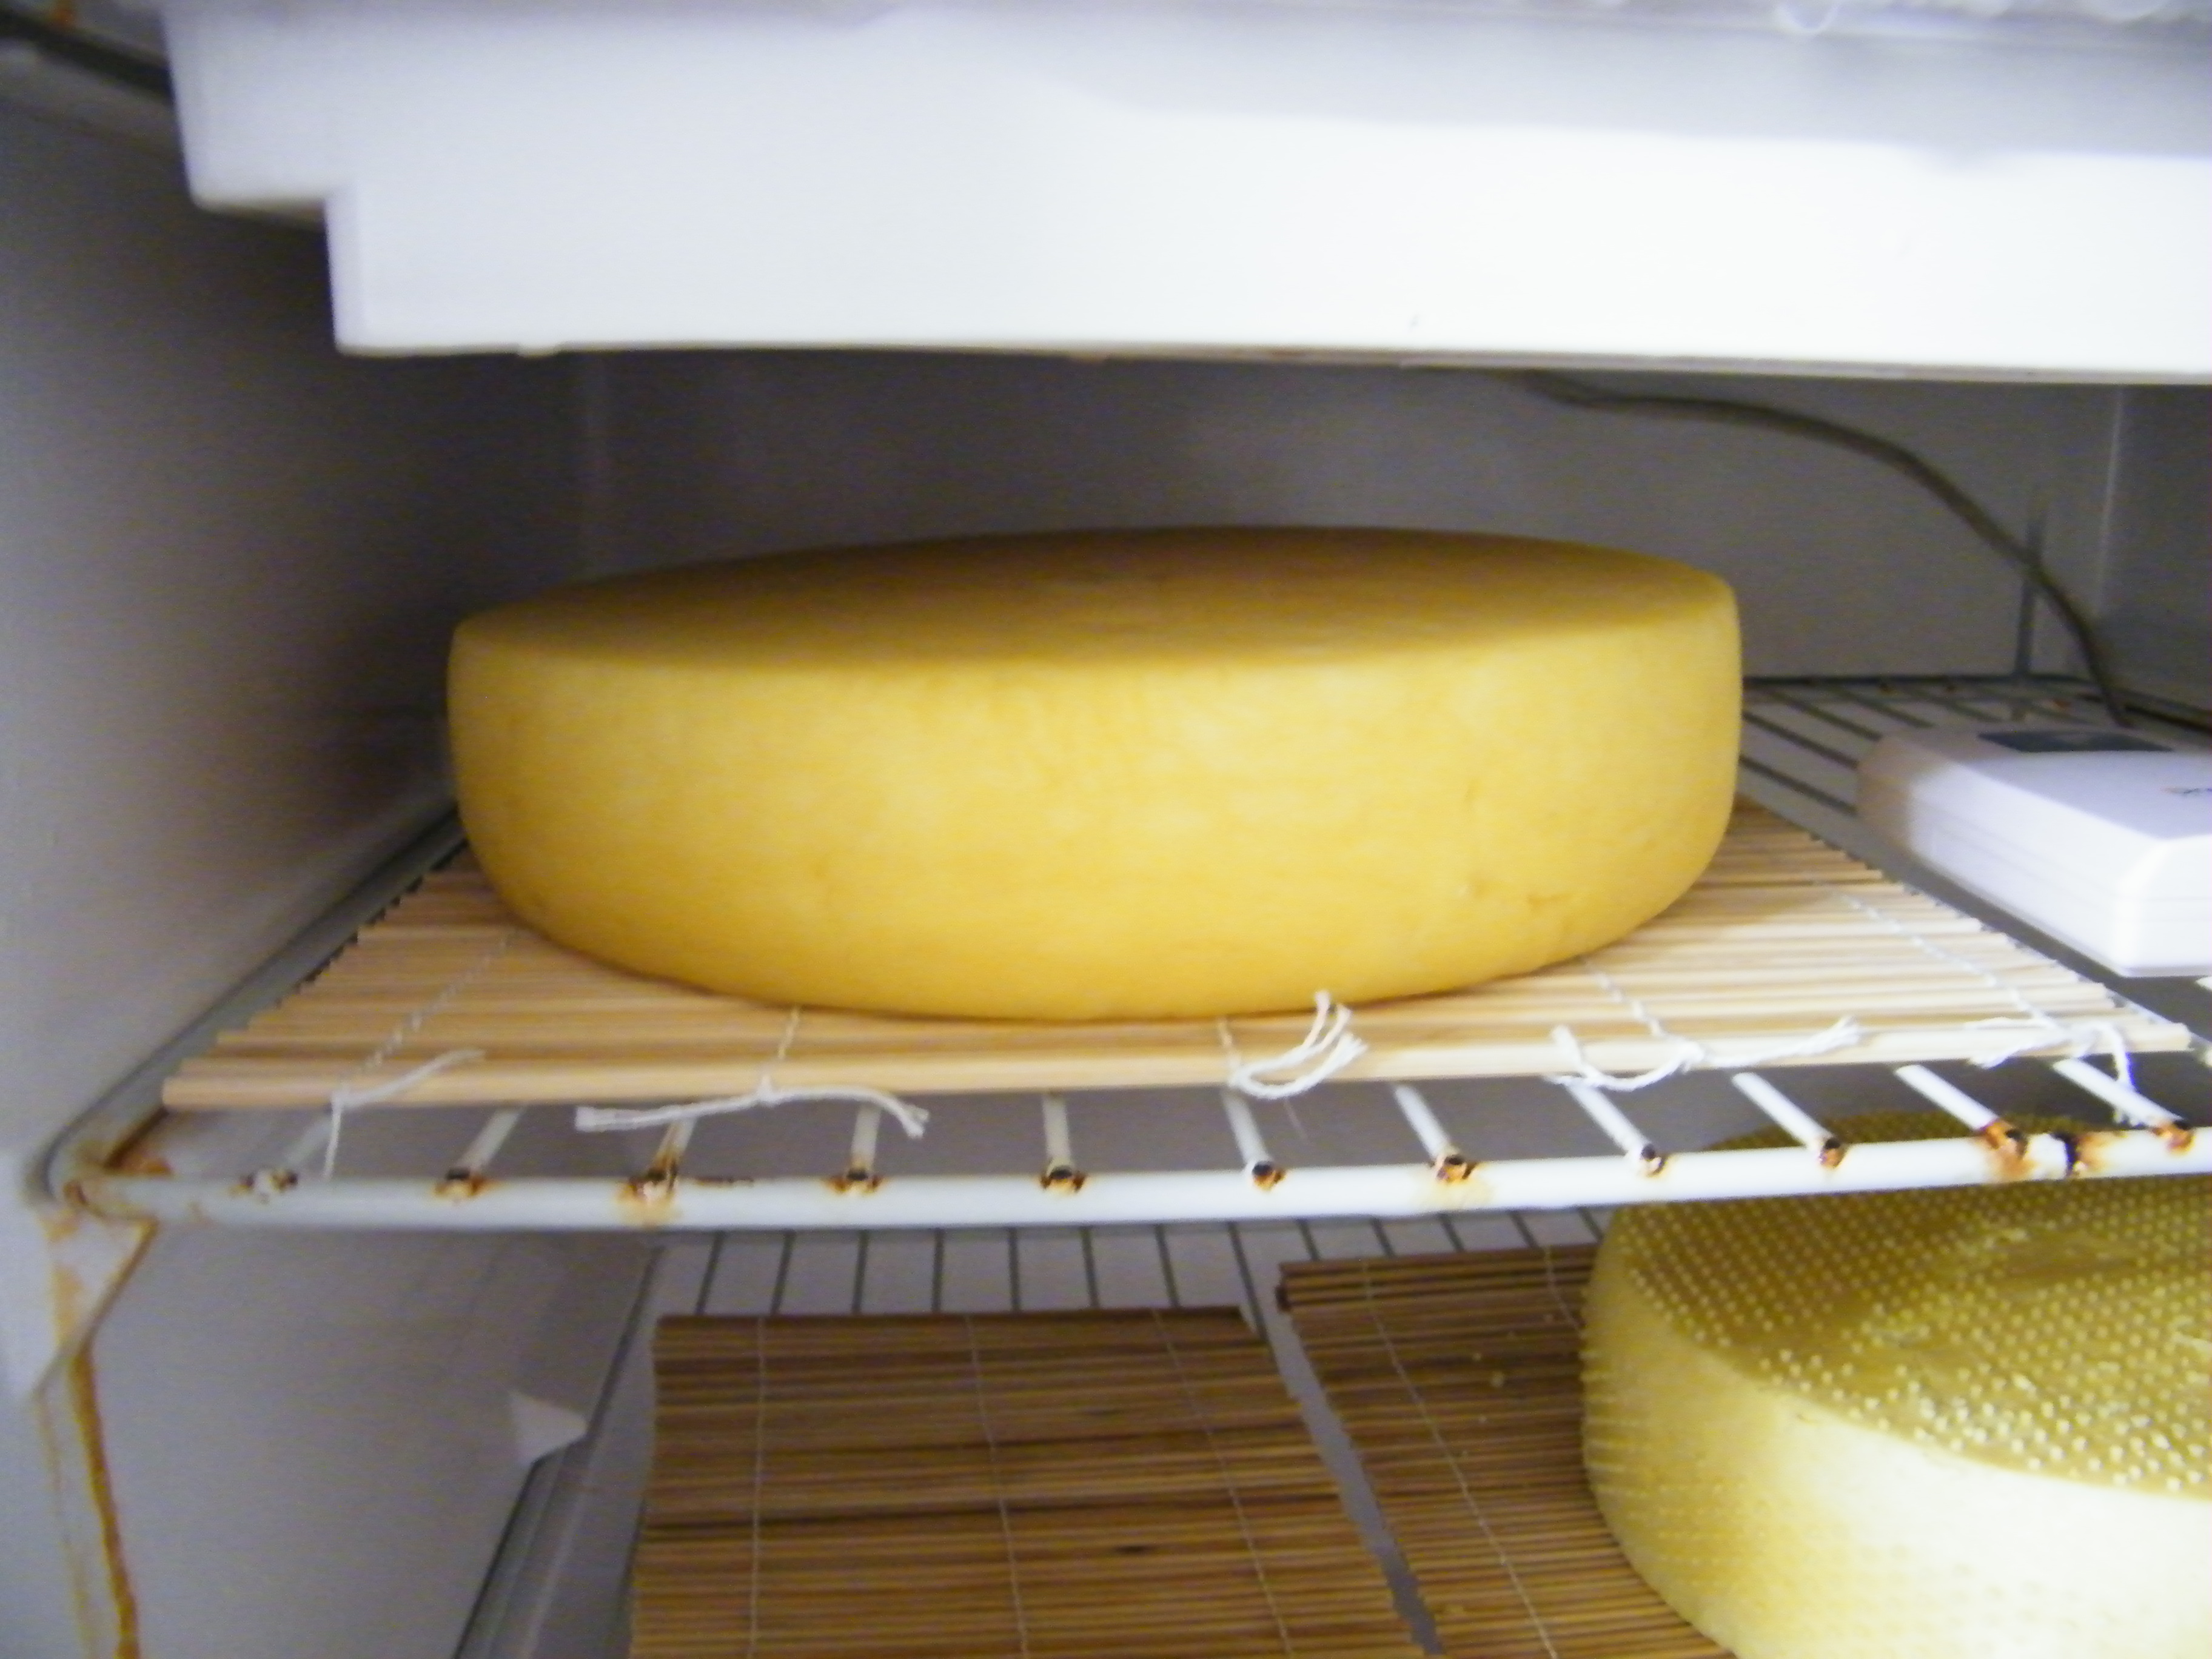
I have a fridge that I am using as a cave but found that the individual plastic boxes with a tray inside is a better solution for the humidity. There needs to be about 85% humidity so that the cheese can release the moisture in it slowly. The plastic boxes inside the cave gives me the best solution to ripening problems. Regular airing, taking away excess moisture collected in the boxes and checking the cheese rind are other jobs. I may wash the cheeses if there is need be with a morge solution to create a rind that I like which also helps with the bacterial ripening.
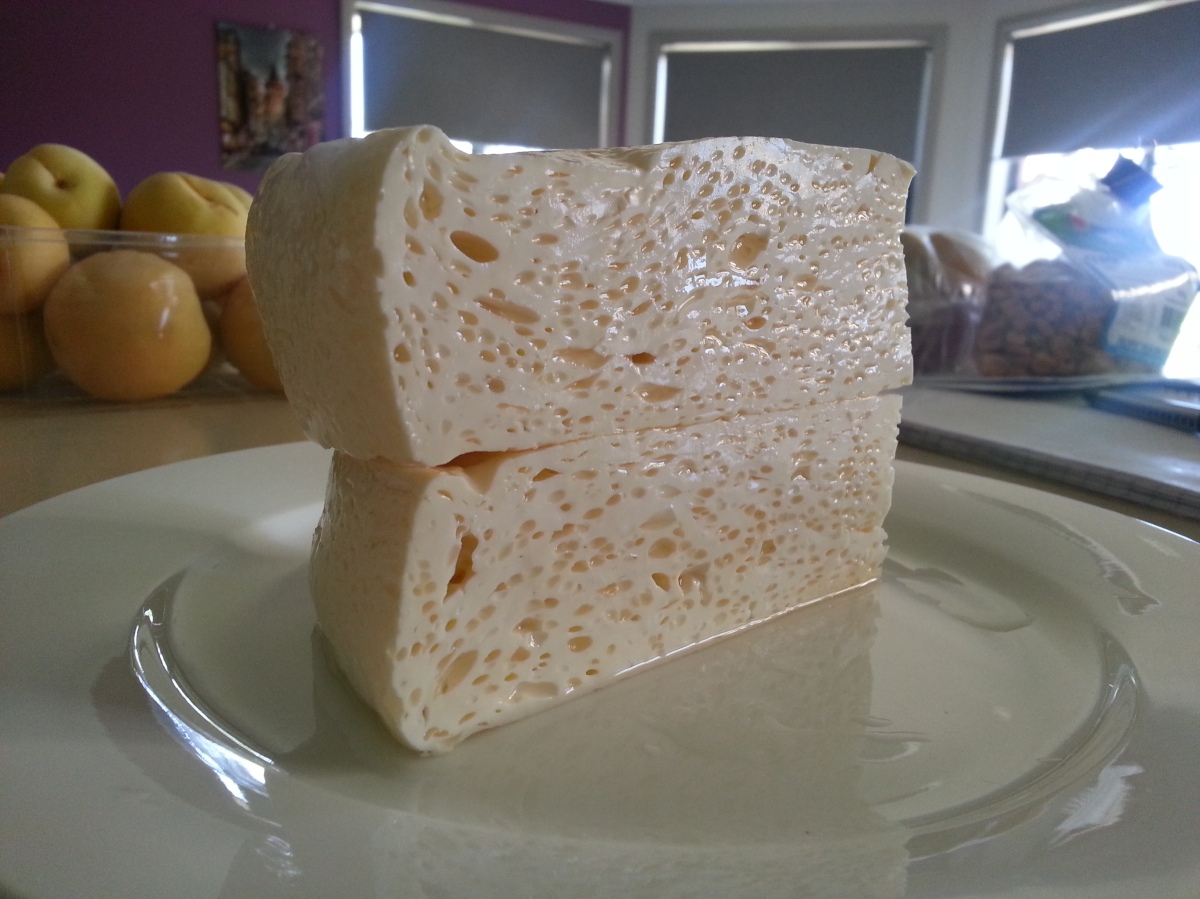
If there are no mishaps, electricity failures and other difficulties, in about 6 months you will end up with a beauty that is not available anywhere else on Earth. The rind is edible, the inner pieces of the wheel is yellow and soft, melts in the mouth like a Turkish delight and if you are lucky, you may even feel the amino acid crystals that are formed during the ripening. Open a homemade mead next to it and you are in heaven.

It has been talked about a lot but there is no real recipe in cheesemaking forum using vegetable coagulants. While I wouldn’t change my real calf rennet to anything, I am interested to develop a recipe that works with a vegetable coagulant agent as it involves research, reading and bit of engineering.
I have read a good research which I am linking here. Basically it will be a thermophilic cheese with higher than usual acidity with added calcium chloride for better coagulation. If anybody knows a Porteguese, Spanish or Algerian artisanal cheesemaker who uses plant coagulants, please try to get some information from them and send me a comment.
The plants that are talked about listed below though I am only going to try globe artichoke as I have only this one growing in the garden. I can also use fig sap but research linked above says a strong odour and browning happens with the cheese that is not desired. I am sure there is a way to use this properly as even Bill Mollison said it is one of the most efficient coagulant for cheesemaking.
Galium verum – Lady’s Bedstraw
Cynara cardunculus – Wild arthichoke
Cynara scolymus L. – Globe artichoke
Urtica dioica – Stinging nettle
Ficus – Fig sap
The process to prepare the artichoke flowers that I am following is entirely experimental. I collect about 10g of purple stems from the plant, dry them under shade, ground them in a clean, sterile mortar and add them to 250ml of slightly salty whey to release the enzymes. I am not sure which enzyme works here exactly. I will keep the whey solution at room temperature in a sterile jar for a day.
The starter amount is slightly higher about 3% of the total milk. Artichoke coagulant works best around pH 5 but that is too high acidity. With some less activity, between 6 to 6.3 will work too. Adding about 3% percent mother starter with CaCl2 will help with the acidity and better coagulation (according to the research I linked above).
The curd may not be as strong as calf rennet curd so very gentle cutting and stirring is required. I will follow the flocculation technique to watch the coagulation, I can than determine the cutting time. Also with the 250ml artichoke rennet, if the floc happens before or after 15 minutes, I can then adjust the amount of veg-rennet.
This cheese will be a hard cheese with cooked curd till I get some shiny texture and pressed only half the weight of the curd like a Tomme style. As I am starting with a higher acidity, I need to closely watch the development during the cooking stage.
The yield is expected to be less than that off the calf rennet but I am hoping the texture and aroma will be different with this one to compensate. If I hit a sweet spot with a nice aroma and texture, I can live with that. I can always do ricotta with the remaining whey to compensate as well so it is not a complete loss.
The quality of the milk is also important. Rich milks like sheep and water buffalo works best. Prefarably raw cow’s milk also works. Goat’s milk with some losses also works but it is too delicate to work with.
Now the recipe:
Heat the milk to 28C to 30C and keep it for about an hour. Depending on the starter activity, we are aiming a pH value of less than 6.3 in an hour or hour and a half including the time to heat.
Once pH achieved strain the artichoke rennet through a sterile muslin to remove the stems and add it to the milk by sitirring up and down to distribute the rennet evenly.
Put your floc cup on the milk and start the chronometer. Floc multiplier is 3.5 (Tomme style).
Cut to half centimeter cubes and let it rest for 5 minutes.
Start cooking the curd by taking the temperature to 35 in about half an hour. When the curd pieces are shrinked to quarter the beginning size and have a shiny appearance, you can stop.
Drain the whey to the level of the curd and let the curd to stick together in the bottom.
Take it to the muslin covered draining basket, put a water bottle with a weight equal to quarter of the curd.
After 15 minutes, remove the cheese, unwrap, turn it over, wrap and press again with the same weight for 15 minutes.
After 15 minutes, remove the cheese, unwrap, turn it over, wrap and press again with the half weight of the curd.
After 15 minutes, remove the cheese, unwrap, turn it over, wrap and press again with the half weight of the curd for another 15 minutes.
With this delicate pressing, the curd will not shatter and drain from the holes.
Now you can continue pressing with a weight equal to the half the weight of the curd.
Brine salting as usual; 1 hour per 500 g of the cheese. This is saturated brine with a pH of 4.7 to 5 at around 14C
Affinage is in the cheese cave for about 3 months and at 85% humidity with 10C.
The seasonal differences in the milk flora sometimes create unwanted results in the end product. There are things you can implement other than changing the name of the cheese by dancing around the cheesemaking steps. A good artisanal cheesemaker should always be on top of the recipe but also react to the sudden unforeseen changes and adjust along the way. It is like continues improvement and risk mitigation process for the engineer minded cheesemakers out there. It is mindfulness for Zen minded people too. (Hi James)
First of all, our parameters to measure the quality of the end product is slightly wider than the commercial production. Your customers should have already learnt that. And to be honest, I would prefer slightly different aroma and texture rather than buying a factory cheese that is consistently sh**ty. Excuse the French but they have good cheeses.
Every time you take your milk in the vat, there are certain amounts of lactic bacteria, mould and yeast already exist in it. As you are the master of this vat, you conduct your orchestra to play a tune that you want by controlling the acidity, time, moisture levels etc.
If you have developed a strong starter culture and trust that it will give you the acidity curve you wanted, heat your milk gently to 67C and keep it at that for 30 minutes. This gentle pasteurization technique kills many of the bacteria while keeping the enzymes mostly intact and opens up space for your local and strong starter culture. Cool it down quickly to desired temperature and pitch your culture.
If pasteurization is not your cup of tea, than add some starter culture to your milking bucket. At the milking temperatures they will thrive and out win the local guys. They will increase the acidity creating a hostile environment for E.coli. If you are not making cheese soon after milking, store it at a cool room or a fridge but not freeze it. Ideally, you should be making cheese immediately after milking with this technique.
Flocculation technique is one to be mastered if you want to hit consistent moisture levels at every make. Combined with mother culture preparation, you will get your consistency.
Flocculation determines when the milk is starting to coagulate after adding the rennet. Prepare your chronometer and a sterilized little cup to float on the milk. Add the rennet at a desired pH level and start the chronometer. Put the little cup on the milk. Nudge the cup every minute once and you will notice it will glide across the milk without any friction. At around 15 minutes mark, the cup will not glide easily and you will see a stopping action like the cup is on brakes. Check the chronometer and note the time, do not stop the chronometer. That is your flocculation time. Based on the cheese you are making, find the floc multiplier and multiply the floc time with it. Let say 15 minutes passed till you added the rennet and flocculation happened. You are making feta so floc multiplier is 4. 15X4=60 minutes. At 60 minutes mark, you should cut the curd. You didn’t stop the chronometer which is a good thing because the 60 minutes cutting time starts when you add the rennet to the milk.
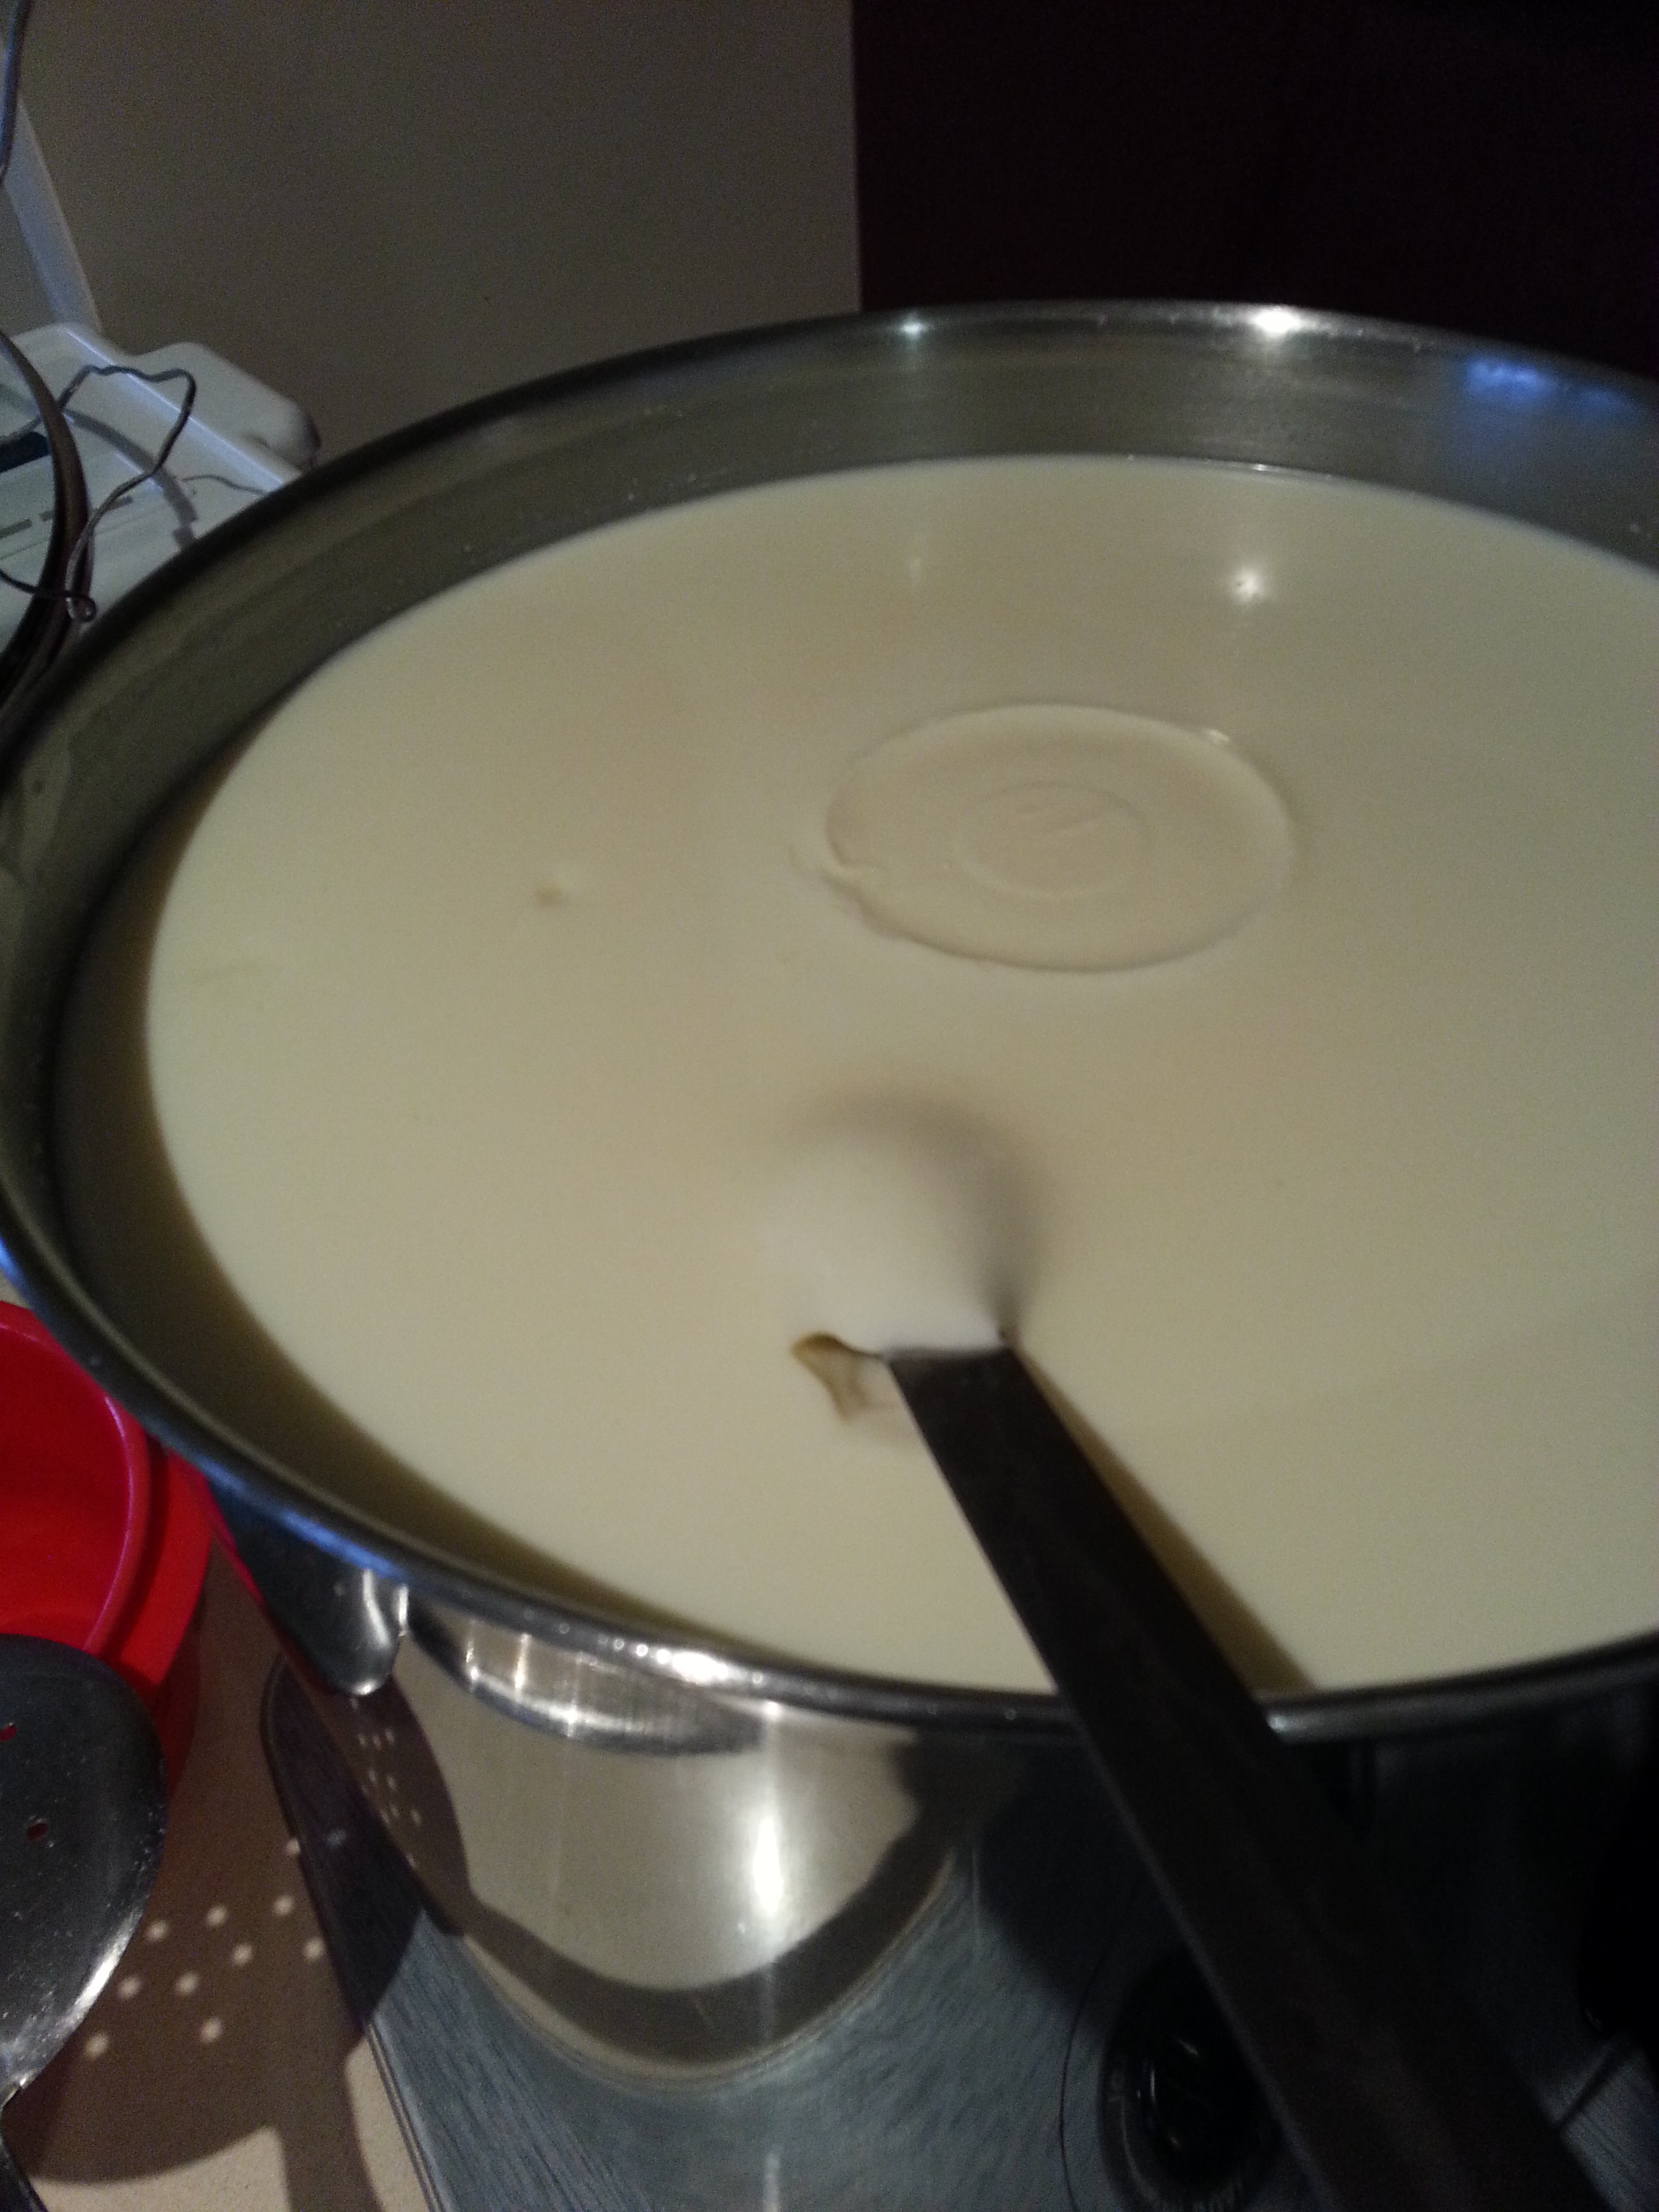
I usually leave the cup on the milk and that is why I have this circle indentation mark on the curd photos from time to time.

Patience. Acidity is not developing, temperatures are not rising, curd is looking sad or acidity going haywire and you are worrying. Should you increase temperature just a little on the stove? Should you remove some whey and add hot water? Should you fill the sink with icy water and dunk the vat in it? Should you go into draining the curds and press quickly? All these methods will have some effect on the cheese for sure. Have patience young Skywalker. Just watch the curd. Take notes. Learn from your mistakes. Before taking any action, think about why it happened and what mitigation strategies you can implement now. What you should do or shouldn’t do next time to end up at the same crossroad.
If you are using store bought pasteurized, homogenized milk there are things you can do as well. First of all I hope your milk is unhomogenized. If you can’t find unhomogenized and if your only option is P/H milk then do this:
This procedure will reduce the water just a little (evaporation), it will mix the cream with milk, it will oxygenate the milk and it will get the broken protein chains to fix with the CaCl2 action. And your cheese will have a better texture and aroma at the end.
Preparing mother culture also gives you consistency and makes sure that your cultures are still alive. If you are buying sachets of cultures or prepared your own and froze it, you can still do this. Just buy a good organic goat’s milk. Pasteurize it in the boiler in its original packaging. Cool it quickly in ice water and pitch your desired thermo or meso cultures at their working temperature. Incubate it overnight and start making cheese the next day. Some of my cultures are in the freezer and way passed their expiry date. If I don’t prepare mother culture like this, I have no idea if they are working or not. Also using active, live cultures at their peak gives you the best results and reduces the milk ripening times about 15 minutes.
Mentioned couple of times above is the note taking. It is your Dairy Diary, write as much detail as you can like pH, TA, temperatures, milk source, starter cultures, times, processes and everything. Only then you can refer back and continuously improve the recipe, notice differences and achieve success (meaning “perfect cheese” and following that is “happy customers” if you are selling).
Happy Cheesemaking
We spend money on sachets of cultures for different types of cheeses and moulds for aroma and washing, rennet and other ingredients. Sometimes it feels like I am spending unnecessary amounts of money on these things. But maybe there is a way to go natural on these ingredients and replace them with alternatives.
The key point in natural cheesemaking is to work with local flora of the environment you are in and supporting these microbiological lives throughout the make. Only then you will achieve the desired aroma and texture ın your cheese.
The basic ingredients we use are milk, salt and rennet in cheesemaking. These should be coming from natural sources. Milk should be raw, salt should be either lake or rock salt and rennet is from the abomasum you harvested, salted and dried. You are already a criminal by doing two of these things in some countries but anyway. Only then you can call your cheesemaking natural. If milk is bought from supermarket that is homogenized and pasteurized, salt is table salt with anti-caking agents and additives, and the rennet is store bought microbial rennet; that cheese would have a premature start to life with an off aroma and strange texture.
When you use quality natural ingredients, your cheese will start its life at the highest calibre it can whereas using store bought milk, table salt and vegetarian rennet will not give much chance to cheese to develop its characteristic aroma and texture.
While salt and raw milk is relatively easy to access, an abomasum is not easy to find for making rennet. Though your desire to make natural cheeses will lead you to places where you meet with people and from them you can possibly source an abomasum if you ask kindly.
When you clean and salt an abomasum and dry it by yourself, you will have your rennet and lipase in a never ending form. When you keep it in the freezer, its shelf life is more than 20 years and its strength is relatively unchanged.
Of course hygiene and sterilisation is always in the mind as we don’t want contamination to ruin our hard work. If you meticulously follow the hygiene rules from milking to consuming the cheese, your cheese will be healthy and free from pathogenic factors that make us sick. You still have to boil water in your boilers and use 1:10 ratio bleach to prevent contamination on your other equipment. We are not trying to cut corners.
Yeast, bacteria and moulds exist everywhere and human evolution depends on the interaction with these. You can’t have pickled vegetables, bread, cheese, kombucha or kefir without them. Our digestive system relies on them. Today’s soaps, shampoos, detergents, deodorants and all the myriad of germ killers are actually harming the environment and not allowing us to evolve further in this symbiotic relationship..
Where is that local flora for cheesemaking?
Let’s have a look at the yeast, bacteria and moulds that we can find around our environment to use in cheesemaking.
Kefir provides plethora of these micro-organisms. Try running the kefiran (that is strained kefir) as a thermophilic starter in your yogurt making setup. The yogurt starter I use at home is part kefir and makes the most wonderful yogurt that we love. I also distribute this starter in my yogurt making workshops. Kefir also has G. Candidum and with a mesophilic starter prepared using kefir, it is possible to make camemberts and bries.
Bee larva in its comb from an untreated hive. Just a 3 cm square comb with larva in it can be used as either mesophilic or thermophilic starter. Just incubate the whole comb in milk at your desired temperatures for meso or thermo and your starter is ready.
Ant eggs or nest soil. This is another source of probiotic as well as lactic bacteria. Again will give you lot’s of cultures to work with.
Raw milk. Making a clobber from raw milk will actually give you the local flora in its entirety. Many cheesemakers prepare their own starters this way using their own milk to carry the terroir features into their cheese. Cow’s, goat’s, sheep’s and water buffalo’s milk will produce and favour different ratios of cultures and whatever the main milk in your cheesemaking, prepare your mother cultures with it.
Dry organic raisins. Or better, from your own grapes. It has natural yeast S. cerevisiae on it and can be used to make holes in the cheese.
Your own natural wine, mead, beer can be used to wash the cheese which will contribute to the surface flora of the cheese to ripen it. Beer mash, if AG brewing can also be used to cover the cheese if you are looking for different aromas.
Natural butter should have L. Diecetylactis and watered fizzy yogurt can have other CO2 producing bacteria and yeast.
Buttermilk you made from your own cream should also have enough life to get your cheese going.
Swiss cheeses’ holes made by P. Shermanii and propionic acid can be sourced from red clovers with a warm tea.
Roqueforti mould can be made by letting a rye breadgo stale and eventually covered by blue mould. Ground and use the dust to get gorgonzola style cheeses
Your own produce of lemon can also be used to separate whey and curds.
As you see, once you know where are these microbiology is hiding, it would be easy to harvest and put them into good use.
Also purple stems of Cynara Cardunculus with its Cardosine A enzyme used to coagulate the milk. White fig sap can also be used for the same purpose. These are two real vegeterian sources of rennet.
Think about it for a second, at the top of the Jura Mountain, which cheesemaker will find a CHR Hansen culture sachet to add to the milk. It is all about the local flora and fauna that favours certain ratios of microbiological life. And this “life” will help you create some of the best cheeses around.
Also plastic baskets used in draining the curds can be replaced with rattan baskets, birch, and willow types of plant materials. Your cheese will have the unique shape and surface features that will give it a rustic characteristic to the cheese where customers learn and look for. Also 100% cotton muslins and clothes should be used rather than polyester cloths. Your cultures should be kept in glass bottles and your cheese vat is either stainless steel or untreated copper.
Of course we have to mention the cheese master who will conduct this orchestra. A master who knows the working temperatures of bacteria, yeast, mould, understands the pH when she/he looks at the curd, even fixes the mistakes throughout the making by adjusting the time and temperatures and produces a consistent cheese every make. These skills are only gained with lots of practice, reading every accessible source, note taking and mastering the moisture, pH, time and TA. You will read Kosikowski’s industrial books as well as David Asher’s Natural Cheesemaking book. Knowledge and skill are two concepts that go in parallel and becomes “wisdom”. The more reading and practice will make you a better, wiser cheese master than the cheese maker who doesn’t read or experiment as much as you do. Also remember that the equipment and freeze dried cultures does not make good cheese. It is the cheesemaker who makes this happen. You have to follow your passion, you should put yourself in it 110% to produce the best quality cheese. Only then you will feel happy and complete. Happy cheesemaking.


Here are some pictures from the latest Cambozola make. These plastic boxes in the fridge AKA chese cave are working real good to keep the humidity high enough for P. Candidum growth.
Last week my Wüsthoff German knife cut my finger. It is not a small cut either, quarter of my nail and a big chunk of meat is gone. After washing, Betadine and careful wrapping, I immediately thought, I am not going to be able to make cheese the next day. So milk went into the freezer. If I get milk again next Saturday, it will be about 40 Liters of milk. Good amount for a large wheel of hard cheese particularly Comte. Comte is a cheese that I have tried before probably four or five times but aging this cheese is always a problem.

 Jokes aside, if you are making cheese at home, and worried that the costs and effort are outweighing the shop prices, try making the expensive cheeses. And do not forget that, if you are using raw or organic milk, your cheese will be a lot more nutritious than the supermarket cheeses.
When I dig the internet for a recipe and our glorious cheeseforum.org, there wasn’t one. So I decided to use the wisdom of the crowd particularly Pav AKA Linuxboy. The entire discussion is here. I must admit, it is easy to make this cheese but the affinage is a big problem. If you don’t have a proper cheese cave where the humidity and temperature controlled precisely, your cheese may turn into granite and requires a jack hammer to crack or a stinky gooey mass where only an old French guy can eat.
Also make sure you have all the starters and aging cultures for morge.
What Wikipedia says about Comte cheese is:
“The cheese is made in flat circular discs, each between 40 centimeters (16 in) and 70 centimeters (28 in) in diameter, and around 10 centimeters (4 in) in height. Each disc weighs up to 50 kilograms (110 lb) with an FDM around 45%. The rind is usually a dusty-brown color, and the internal pâte is a pale creamy yellow. The texture is relatively hard and flexible, and the taste is strong and slightly sweet.”
Of course, whatever milk and culture you use, your cheese will not be a Comte without the terroir qualities of the Jura mountains and its characteristic grazing areas providing a diverse salad bar to the Montbeliarde cows. The milk and its features, the bacterias, morge cultures and other local ingredients that make their way into the milk and make are the true terroir features that makes this cheese a unique experience. Buy some Comte cheese and educate your palate first so that you can tell if your cheese is close or not.
I have started with 40L of milk in two 20L boilers. It will be hard to measure and control the acidity with these 2 separate boilers but this is what I have. Later in the milk ripening stage, I mixed the milks with my measuring cup. Also close checking of the pH gives me the accuracy I need.
Heat milk to 32°C to 33°C.
CULTURES
Streptococcus Salivarius Thermophilus (20 DCU – per 100 litres) (TA60)
Lactobacillus Helveticus (5 DCU – per 100 litres) (LH100 from Danisco but one more different bacteria comes in with it which actually might help as it is Lactobacillus delbrueckii subsp. lactis)
Propionibacterium freudenreichii subsp. shermanii (0,05 – 0,1 unit – per 100 litres)
And LD Type starter, that is Flora Danica
Inoculate your milk with the above concoction and wait about an hour.
RENNETING
Add rennet, mix well. Place the floc bowl.
Target flocculation is 12 to 15 minutes minutes. Multiply this 2 or 3 to find the cutting time.
CUT
Cut to 4mm pieces (or rice size), rest and heal 10 min.
Stir and find the big pieces of curd, cut them.
After healing:
First phase: Stir gently to help firm up the curd and start syneresis. This is before scalding. Do this for 10-15 min.
Second phase: Start scalding to 51°C, or a tad higher, to 53-55°C over 30 min.
Third phase: This is post scalding, where you are targeting the right curd moisture at the right acidity. Meaning, this is the artisan skill. If you have over dry curds, but your acidity is not there, you barely stir, and let it settle. If the curd is moist, too moist, you stir and try to get that moisture down. If the acidity is running away, you try and wrap it up and press as soon as you can. But the point is that you turn off the heat and get the curds down to the right point over the next 15-45 min. Wide range is because of variability.
Let the curd settle at the bottom. Press under whey to make PS work better. Draining acidity is about pH 6.45.
Transfer the curds in to press and press with 10-15 psi till the pH becomes 5.4. Flipping and gradually increasing the weight is necessary here.
Remove from the press once you reach to pH 5.4 and into saturated brine. Your brine should be at 14°C and pH4.7 to 5 and with a time calculation of 12 hours per 1000Gram of cheese. Prepare the brine from whey and add some CaCl2 and rock salt. This creates a good crust so you can start with the morge and have it penetrate slowly over time.
AGING
First phase: at 10-13°C, for 20-30 days. Usually 3 weeks, or a few days over. This is to get the curd to have that initial fuse and prep it for warm room.
Second phase: at around 18°C, for 40-55 days. This is when you move to the warm room for propionic action, and where you can also start the morge. By this time, there should be a decent rind on the cheese, and you can start the wash with B. Linen and Microccocci.
Third phase: back to 10-13°C, keep washing with morge.
Overall, you want humidity to be pretty high when you first start with the morge. And after, there’s no single right answer. During extended aging, you are really trying to balance the rate of moisture loss, so the wheels do not dry out. 85% will work. Somewhere around 90% is better. But in a small cave like you will use, do the best you can. The dynamics are different anyway, so 85% vs 90% doesn’t make a dramatic difference. Keep it dry enough so it doesn’t turn into a Limburger or have a wet rind.
Affinage is about a year. After the first 6 months you can vacuum pack the cheese to prevent over drying.
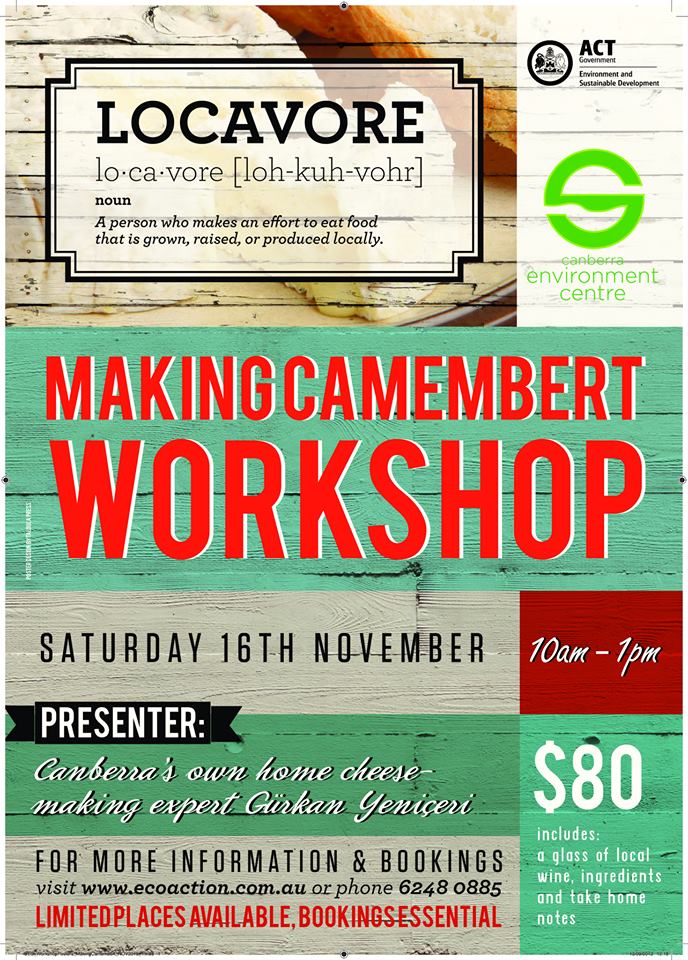
As I am preparing to give the Camembert workshop in Canberra on 16th of November, I thought it would be good to put down some basics.
When I first tried to make Camembert (Cam for short) couple years back, I was reading horrible results like slip-skin, ammonia smell, pungent aroma, contamination during the aging etc and was thinking that, this must be one of the hardest recipes (don’t get me wrong, the hardest was Comte) I was going to try. After much reading and trying to put together a recipe with floc, pH and correct ripening requirements, I realized that, it wouldn’t be so hard to make this cheese.
As I am an engineer, technicality of making this cheese; once written down to every details, didn’t scare me much. Once I have got the confidence, I started gathering necessary cultures.
There are 2 cultures that will grow that white musroomy skin on the cheese. These are Geotrichum candidum and Penicillium candidum. While it is possible to harvest these cultures from shop bought cams or bries, I recommend buying the actual culture from cheesemaking suppliers. I will explain why.

Most slip skin problems occurring during the aging are the result of too much moisture left in the cheese that give lactic acid bacteria more food as lactose and before PC or GC takes over. Availability of lactic acid overworks the P and G Candidum. Also ripening temperatures during the warmer months will accelerate this process.
There are two ways of attacking this problem to solve. First of all get your temp and humidity controlled environment for ripening into a stable level. And the second is to use a good culture strain to prevent slip skin. As this cheese is a fresh and high moisture cheese, contamination problems are also very prominent among the artisan cheesemakers. If you are trying to harvest white mould from shop bought cams and bries, you may be inviting other moulds and bacteria unknowingly, which will create problems with your making.
MILK
I use mixture of fresh, raw cow’s and goat’s milk for my cams. I have tried using lipase with cow’s milk only but my taste buds were not agreed. If I have the chance of using only goat’s milk, I would go for it.
Whatever the milk you use, if you don’t trust the source or getting shop bought milk, please pasteurize before use by keeping it at 65C for 25 minutes and cooling it to renneting temperature immediately in an ice bath.
I don’t add any extra cream as I don’t have a source of cream but if you want to make a double brie, you may try.
CULTURE
The starter culture for this cheese is mesophilic. Any mesophilic will do. Diacetylactis variants will give a buttery flavor and if you are trying Cambozola, I recommend a gas producing starter like Flora Danica or adding yeast specifically designed to make holes in cheese (not P. Shermanii like in Swiss cheese).
One day I used only goat’s milk for Cambozola (love child of Camembert and Gorgonzola) and the resulting cheese was one of the best aromatic cheeses I have ever made so much so that I can not eat normal cam/brie any more.
DRAINING BASKETS
Forget about bamboo mats and sandwiches. Hard to use, hard to manage and harbors unwanted bacteria. I am using a single plastic draining basket. They are cheap, works well and stack-able for extra draining. I bought 7 of these and use it for feta and cam. They are very easy to use.

BRINE
Most recipes on the internet will tell you to dry salt the cam with about 3% of the cheese’s weight. As I make cheese at home, I always have brine available and I always brined cams rather than dry salting. Cam is a small cheese and 2 hours of brining in a saturated brine will do. Brine bowl/bucket should be kept in the ripening fridge at about 10 to 14C and top surface of the cheese should be sprinkled with salt to prevent contamination and also should be flipped after first hour and sprinkled with salt again. Flipping is necessary to get the salt sucked in equally on both sides.

AGING CONTAINER
There are food grade plastic boxes available with half way shelves in them. The one I found in the picture takes 3 cams in it and perfectly fits in my cheese fridge. Also because the wholes are larger, it does not interfere with the P.C. development. This humidity chamber shall be kept in the cheese cave and the humidity should be contained around 95%. The box should not develop water beads on the sides and lids and during the first couple of days; it should be drained and wiped with a cloth (cloth dunked in 1:1 vinegar, methylated spirit solution to sterilize). The cheeses should be flipped everyday once or twice to assist P.C. development.


MAKE
8 liters of milk will give you about 5 cams depending on the size of baskets you use. Only goat or half goat half cow milk will do. Make sure you also have enough ripening containers.
Mesophilic Starter either DVI (as per manufacturer’s measure) or mother culture (%2 of milk so for 8 liters, use 160ml MC)
PC or GC or mixture of these.
Rennet (as per manufacturer’s measure)
If pasteurizing your milk, cool it down to 30C in an ice bath and keep the temp constant through out the making.
Add your starter and PC or GC into the milk and stir well.
Wait about an hour or if you have a pH meter, wait till you read pH6.4.
During the milk ripening period above, stir the milk every 15 minutes to get the culture distributed evenly.
Add diluted rennet and stir well. Make sure rennet is not expired and the water used for dilution is filtered and does not contain chlorine and other nasties.
Rest the milk for an hour and keep the temp constant at 30 to 32C as much as you can. Running kids, pets should be prevented. If the temp drops, do not heat it on stove as the heat will not distribute evenly. Use a hot water bath in your sink.
After an hour, check for clean break, If the curd is breaking cleanly, it is time to cut.
Cut the curd to about 2cm cubes. Stir with a ladle from bottom to top and find those bigger curds to cut them.
Once you finish cutting, let curds “heal” for 5 minutes.
Stir every 10 minutes to break the curds (as they stick together again) gently. Check the look and feel of the curds, after a while, they should shrink, firm up and get a glossy look. If they are still big and do not shine; continue stirring every 10 minutes.
Once you get that glossy look, remove the whey to the level of curds and start filling the baskets with curds.
The baskets I am using are 8cm tall. So I fill them up to the top. When the curds drained, they come to around 3cm tall disks which look like the commercial cams.
Drain at room temperature without any weight. To be honest, I stack 2 baskets on top of each other and then flip the cheese regularly (if it can be handled easily) in the baskets as well as taking the top basket to bottom. This speeds up the draining stage.
After draining overnight and both sides are flat and uniform, take them into brine for salt infusing. Salt helps the aroma to develop. If dry salting, make sure you use about 2% or 3% salt compared to the weight of each cheese. Brine time is 2 hours with flipping after first hour.
Once they are brined or dry salted, they are ready to go into cheese cave in a humidity chamber.
Cheese cave should be adjusted to between 10 to 12C and the humidity will be kept constant by the boxes we use.
Place the cheeses in the fridge and flip them everyday. After couple of days, you will see white fury skin developing. Drain excess whey in the containers and wipe the boxes to remove water.
Once the entire cheese surface develops white mould (about end of first week), wrap them in cooking paper and aluminium wrapping. Place them in your normal fridge at 4C for further aging.
The entire aging is about 4 weeks depending on temperature and moisture level in the cheese, starts in the humidity box till it finishes in refrigerator. Test the cheese by pressing the centre gently in its wrapping. If it is soft to touch, consume.
VARIATIONS
Try washing the cheeses with unpasteurized beer or wine every second day during the mould growing period.
Make vegetable ash and cover the cheese with it as soon as they come out of brining. This helps PC development and prevents slip skin
Wash the cheese with a Brevi Linen morge every day.


I am teaching “How to make Camembert” at the Canberra Environment & Sustainability Centre‘s workshop. This will be the second workshop where you get your hands dirty with whey and curd. You will learn the making, ripening and ageing process of Camembert. See you in the workshop.
This recipe has no name. My aim is to show what sort of equipment you will need during the cheese making at your kitchen.
This cheese will be close to Turkish Beyaz Peynir or Greek Feta. It would be a nice cheese to eat at breakfast table, in salads, or as a present in olive oil.
We will use 8 liters of milk which will give you about 1 Kg of cheese. If your milk is unhomogenised you may even get close to 1.5 Kg. You may mix 6 liters of cow’s and 2 liters of goat’s milk for this recipe. Preferably organic milk and most importantly unhomogenised. Additional goat’s milk will give a little tangy flavor and character to the cheese which I like. You can alternatively buy lipase enzyme powder from the online shops I have listed in my Resources page.
You will be using starter culture to acidify the milk be it mesophilic (buttermilk) or thermophilic (yogurt). A fresh home made yogurt (never touched by a spoon yet) or buttermilk opened and kept on kitchen bench for 24 hours and curdled will be our starter culture.
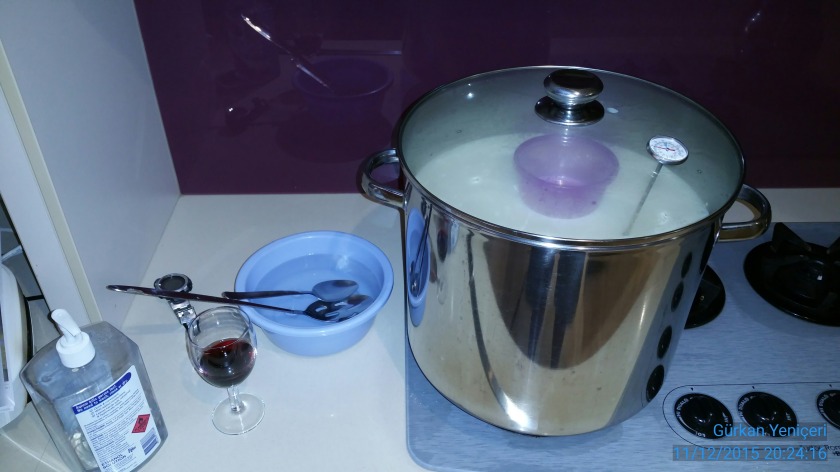
Firstly, you will need a 8 liters capacity stainless steel (aluminium does not work) boiler. And either another larger one to fit the 8 liters one into it or large enough sink to keep the 8 liters boiler in a water jacket. You need to sterilize the boiler by boiling water in them for 1 minute and using it straight away.
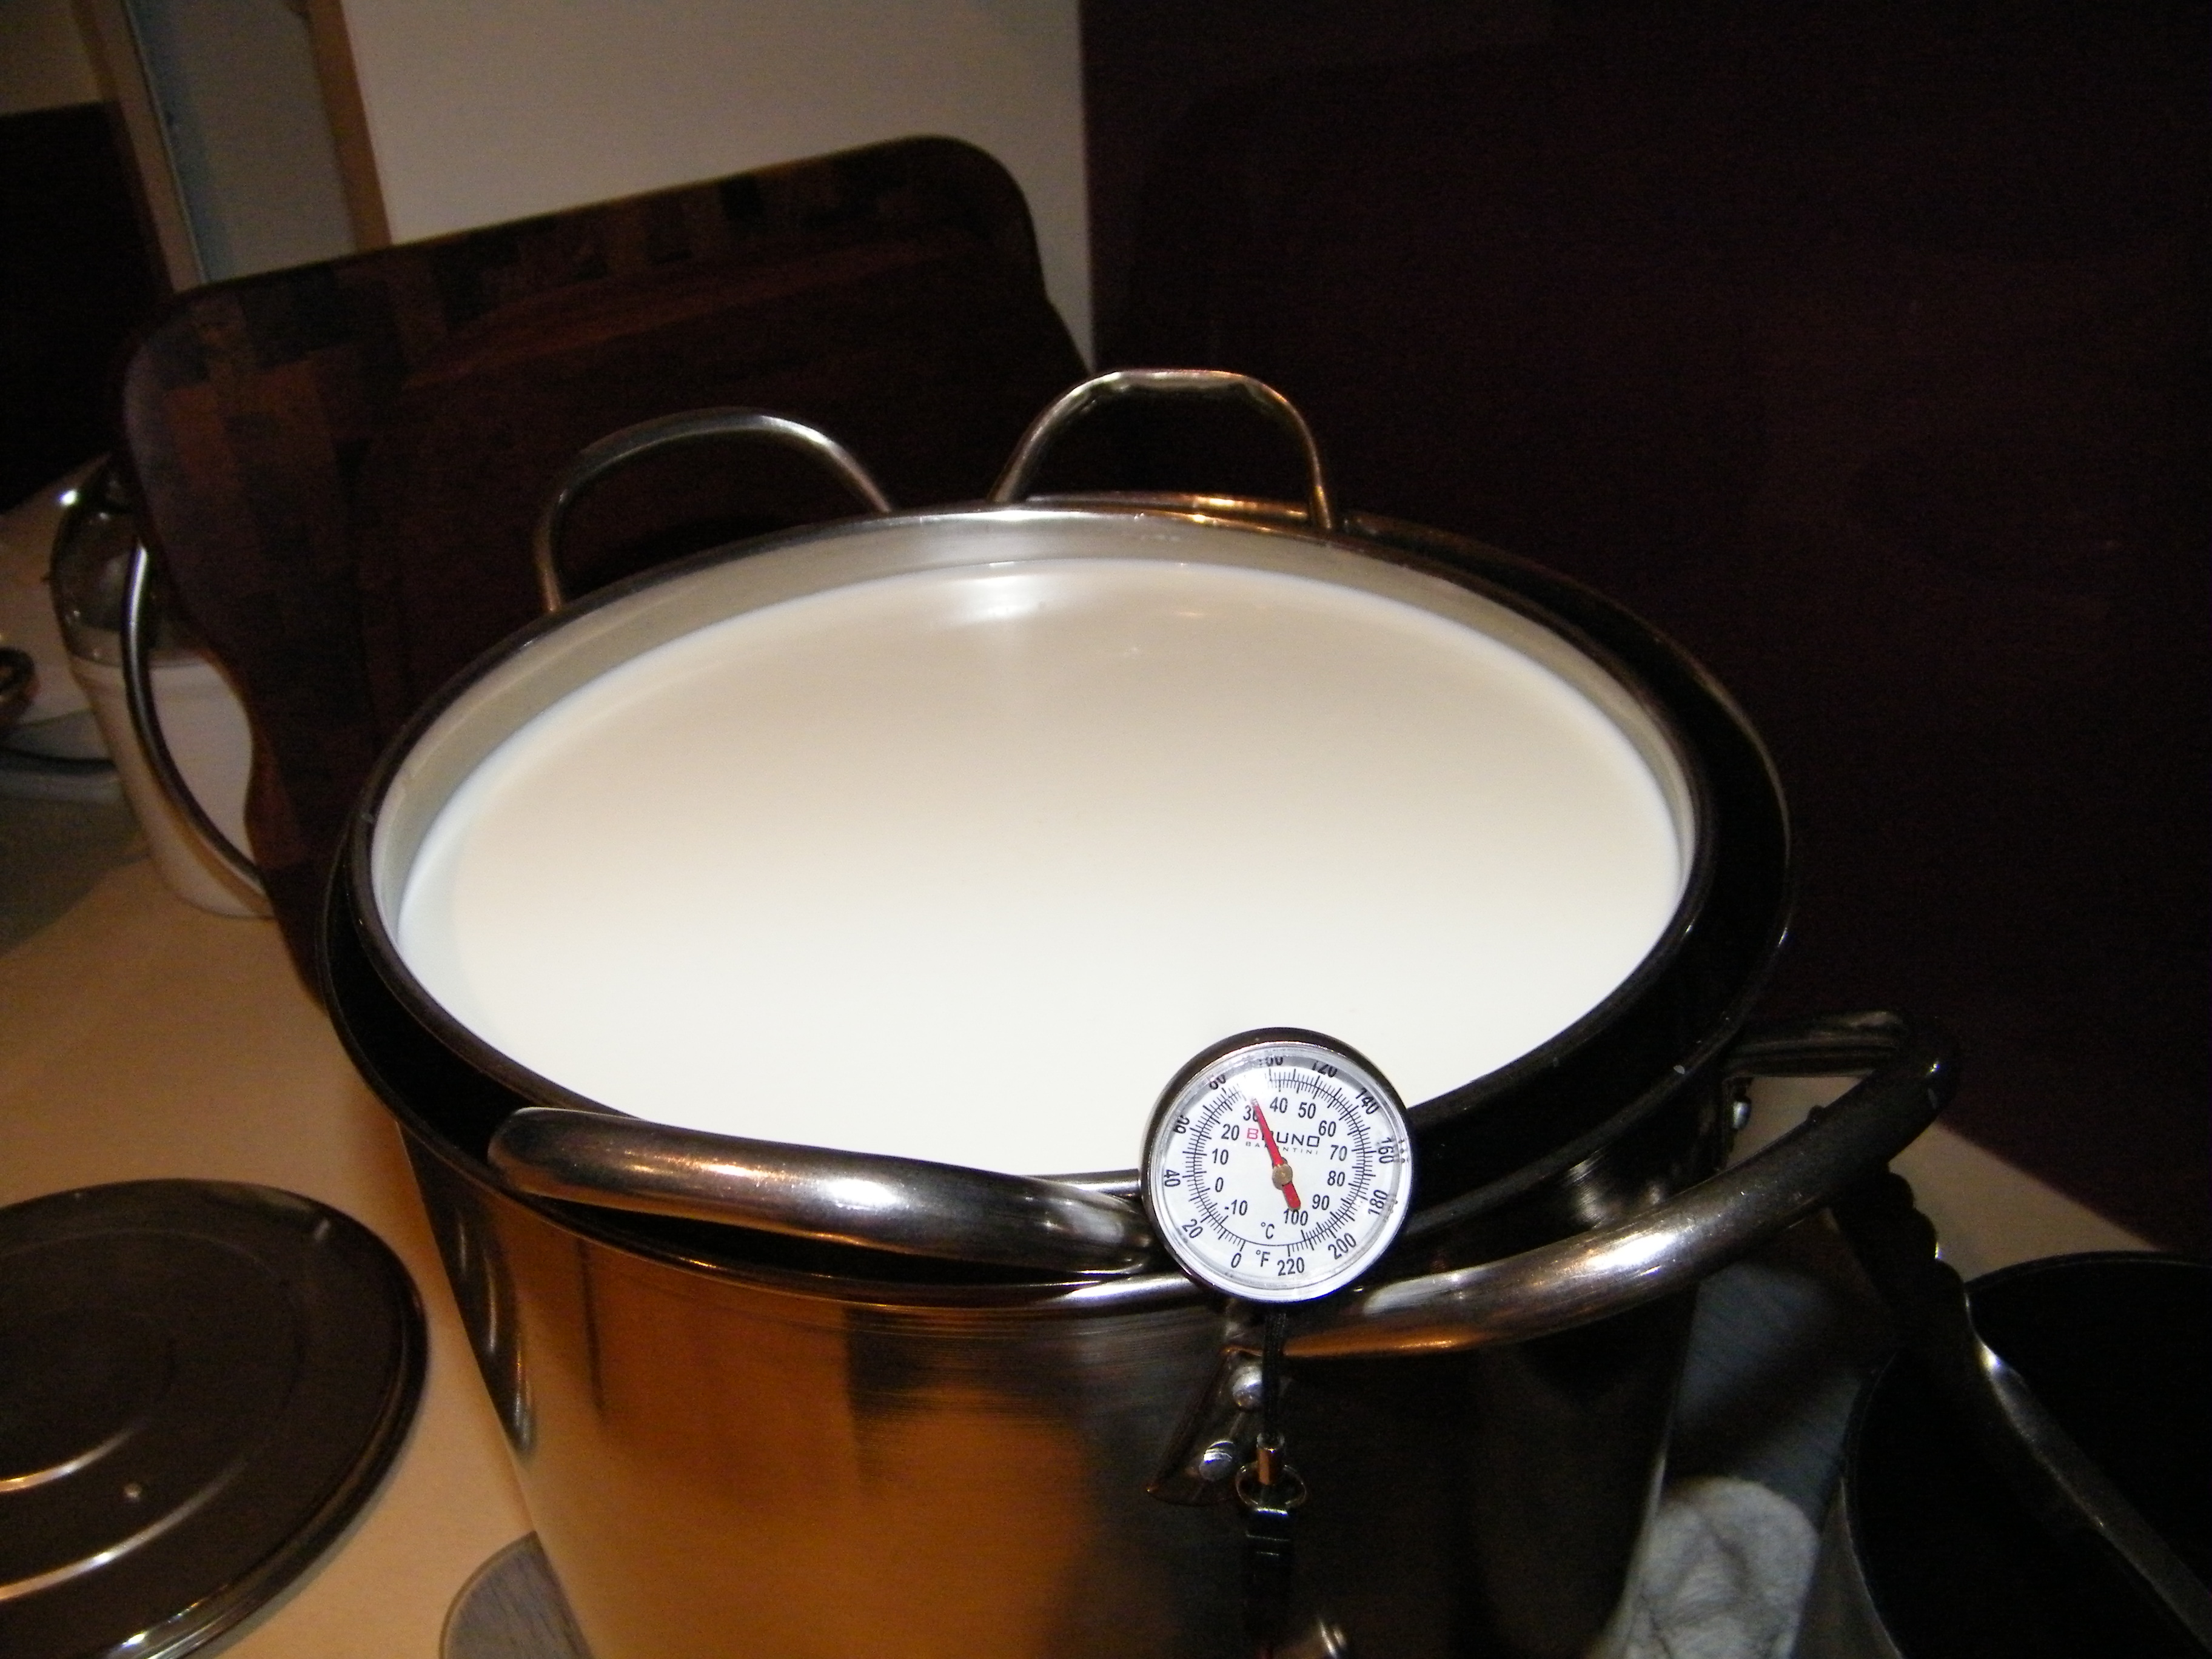

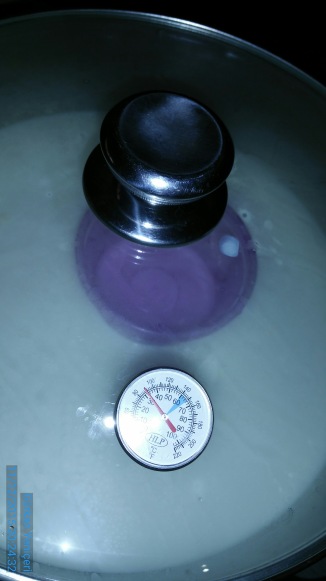
The biggest problem for new starters is to keep the temperature constant for long periods. I strongly think bain-marie method is the best for cheese making situations. Also as you on both pictures; temperature is measured by thermometers. I recommend getting at least 2 thermometers with a range of 0 to 100 C. It is important to have a good thermometer for cheese making purposes as even the 1 degree changes will end up with a different cheese.
Make sure the boiler comes with a lid. As we will be leaving the milk in there for long periods, we don’t want dust and other things to get mixed with the milk.
Mix your milks in the boiler and add starter culture of your choice and optionally lipase powder diluted with water.
If you used mesophilic type culture, keep the temperature around 24 to 27 C degrees.
If you used thermophilic culture, somewhere between 31 to 37 C degrees will do.
No matter what starter culture and temperature you are using; make sure you are recording every details.
After adding starter culture and keeping the temperature constant, wait about an hour. This “waiting” will acidify the milk giving the bacteria chance to develop, consume the lactose in the milk and creating lactic acid. If you have pH meter, measure the pH before adding the culture and after 1 hour to see if there is a drop in pH which indicates the starter culture is working.
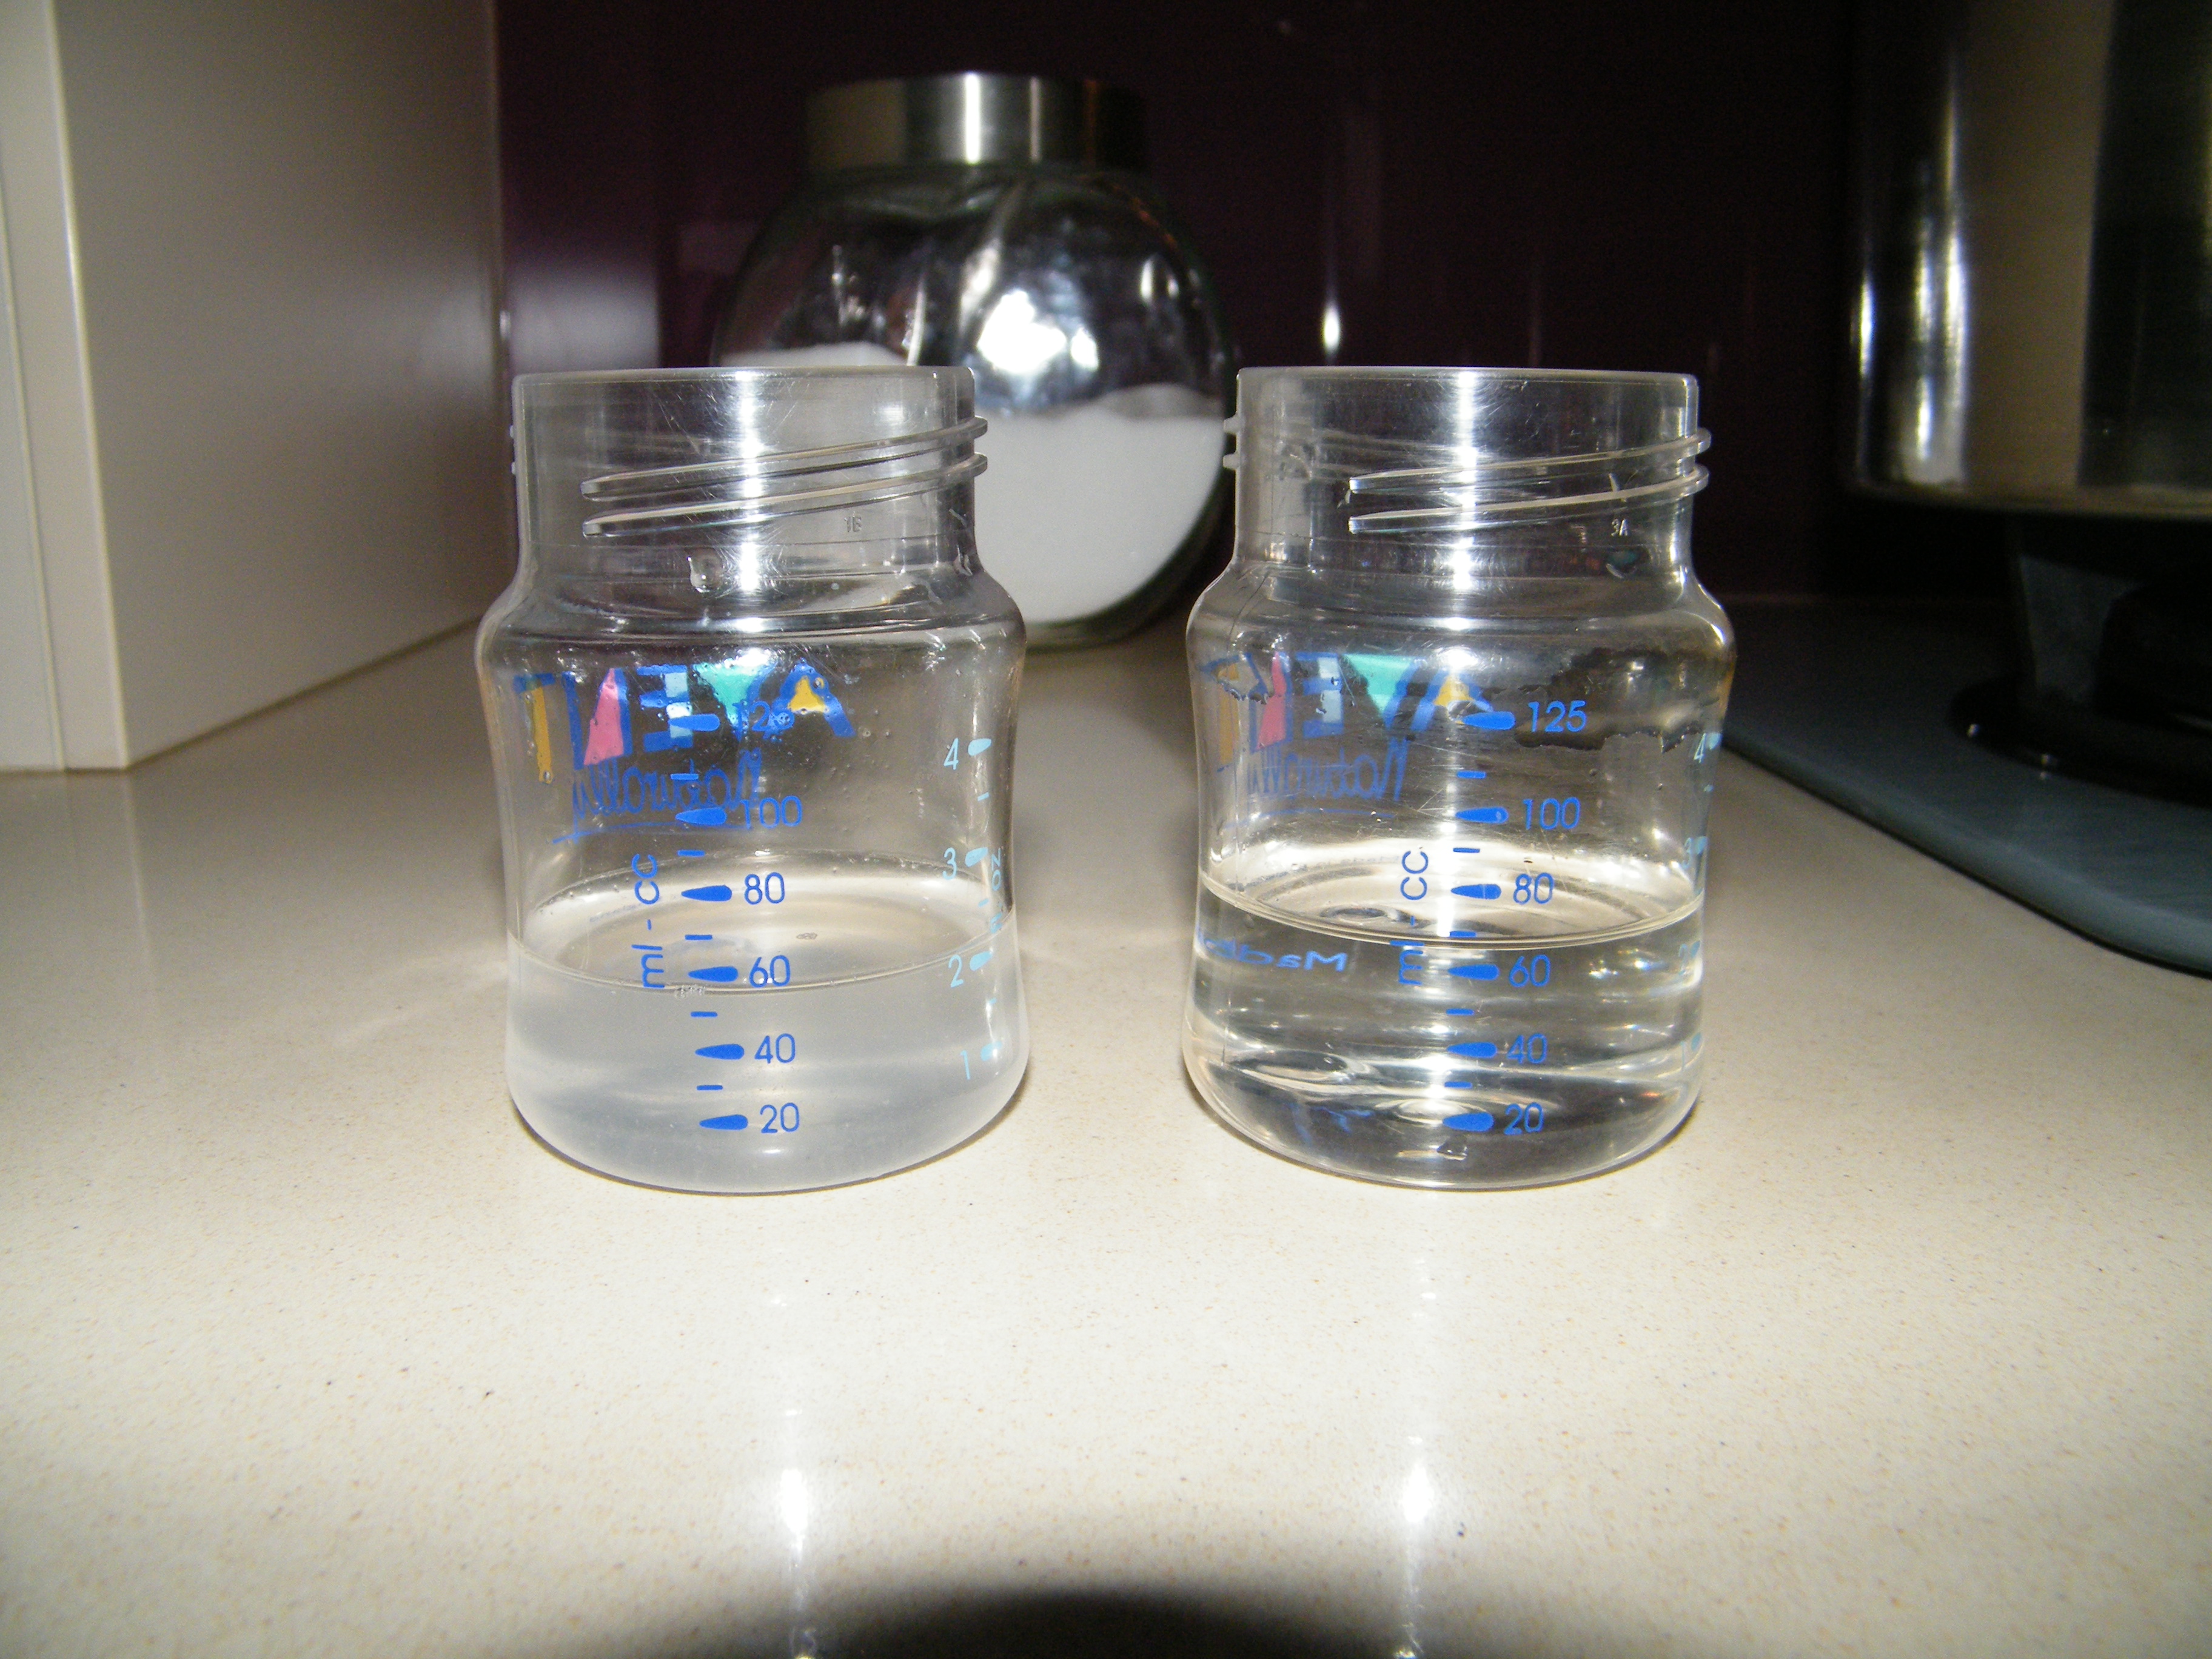
After 1 hour add rennet to the milk and mix for a minute. Rennet should be measured according to the manufacturers instructions and diluted with 60 ml unchlorinated water. Use a baby feeding bottle for measuring.
The temperature should be kept constant through out the waiting an hour after adding the rennet. As the acidity increased with the starter culture, rennet can now work better in the milk to curdle it. In 1 hour time, you should get a custard like gel formed and may be separating from the sides of the boiler.
We need to test the curd for its readiness to go to the cutting phase. To do this, dip a knife into the curd vertically and lift it up horizontally.
Or use your finger as a knife.
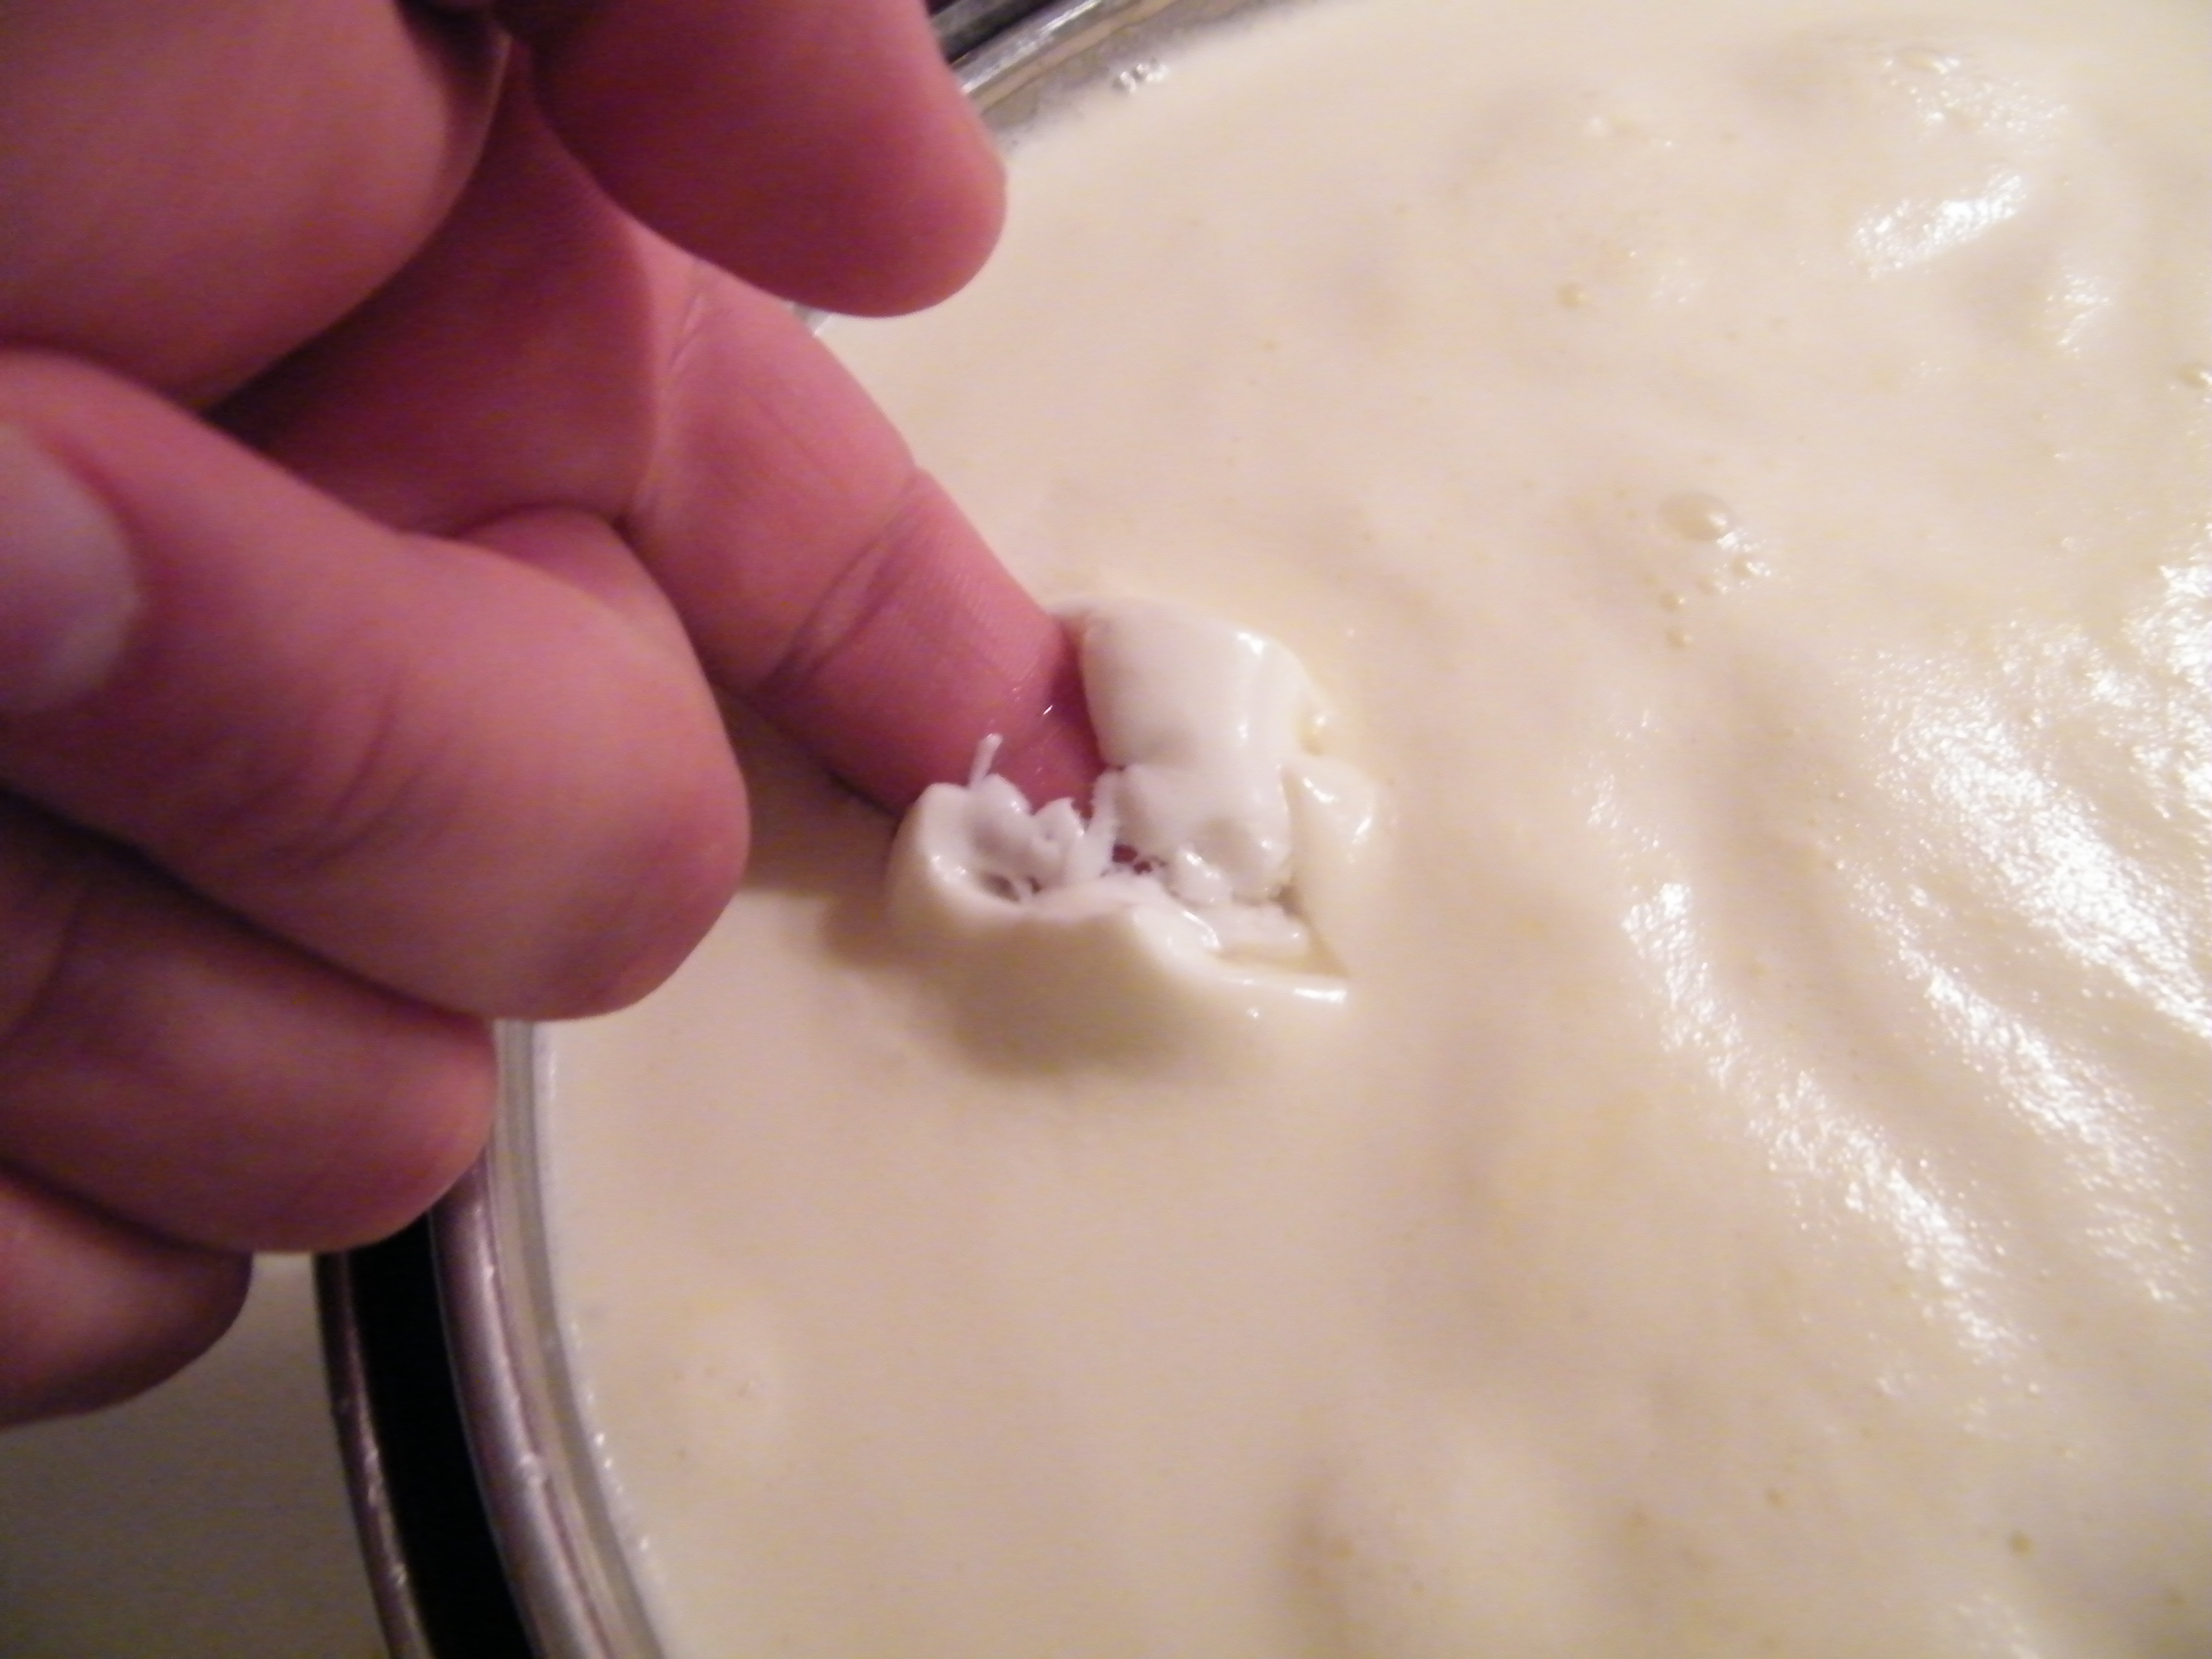
The idea here is to see the curd breaks cleanly without leaving any smudge on the knife or your finger. A fairly hard and stable curd is an indication of a good cheese making start. If you are not getting the clean break, make sure your starter is working and rennet is not expired. You can increase the rennet by half a milliliter next time. You should get a nice curd at the end of 1 hour after adding the rennet.
If curd is still runny like yogurt, wait another 15 minutes and est again. Make sure temperature is constant since the beginning.
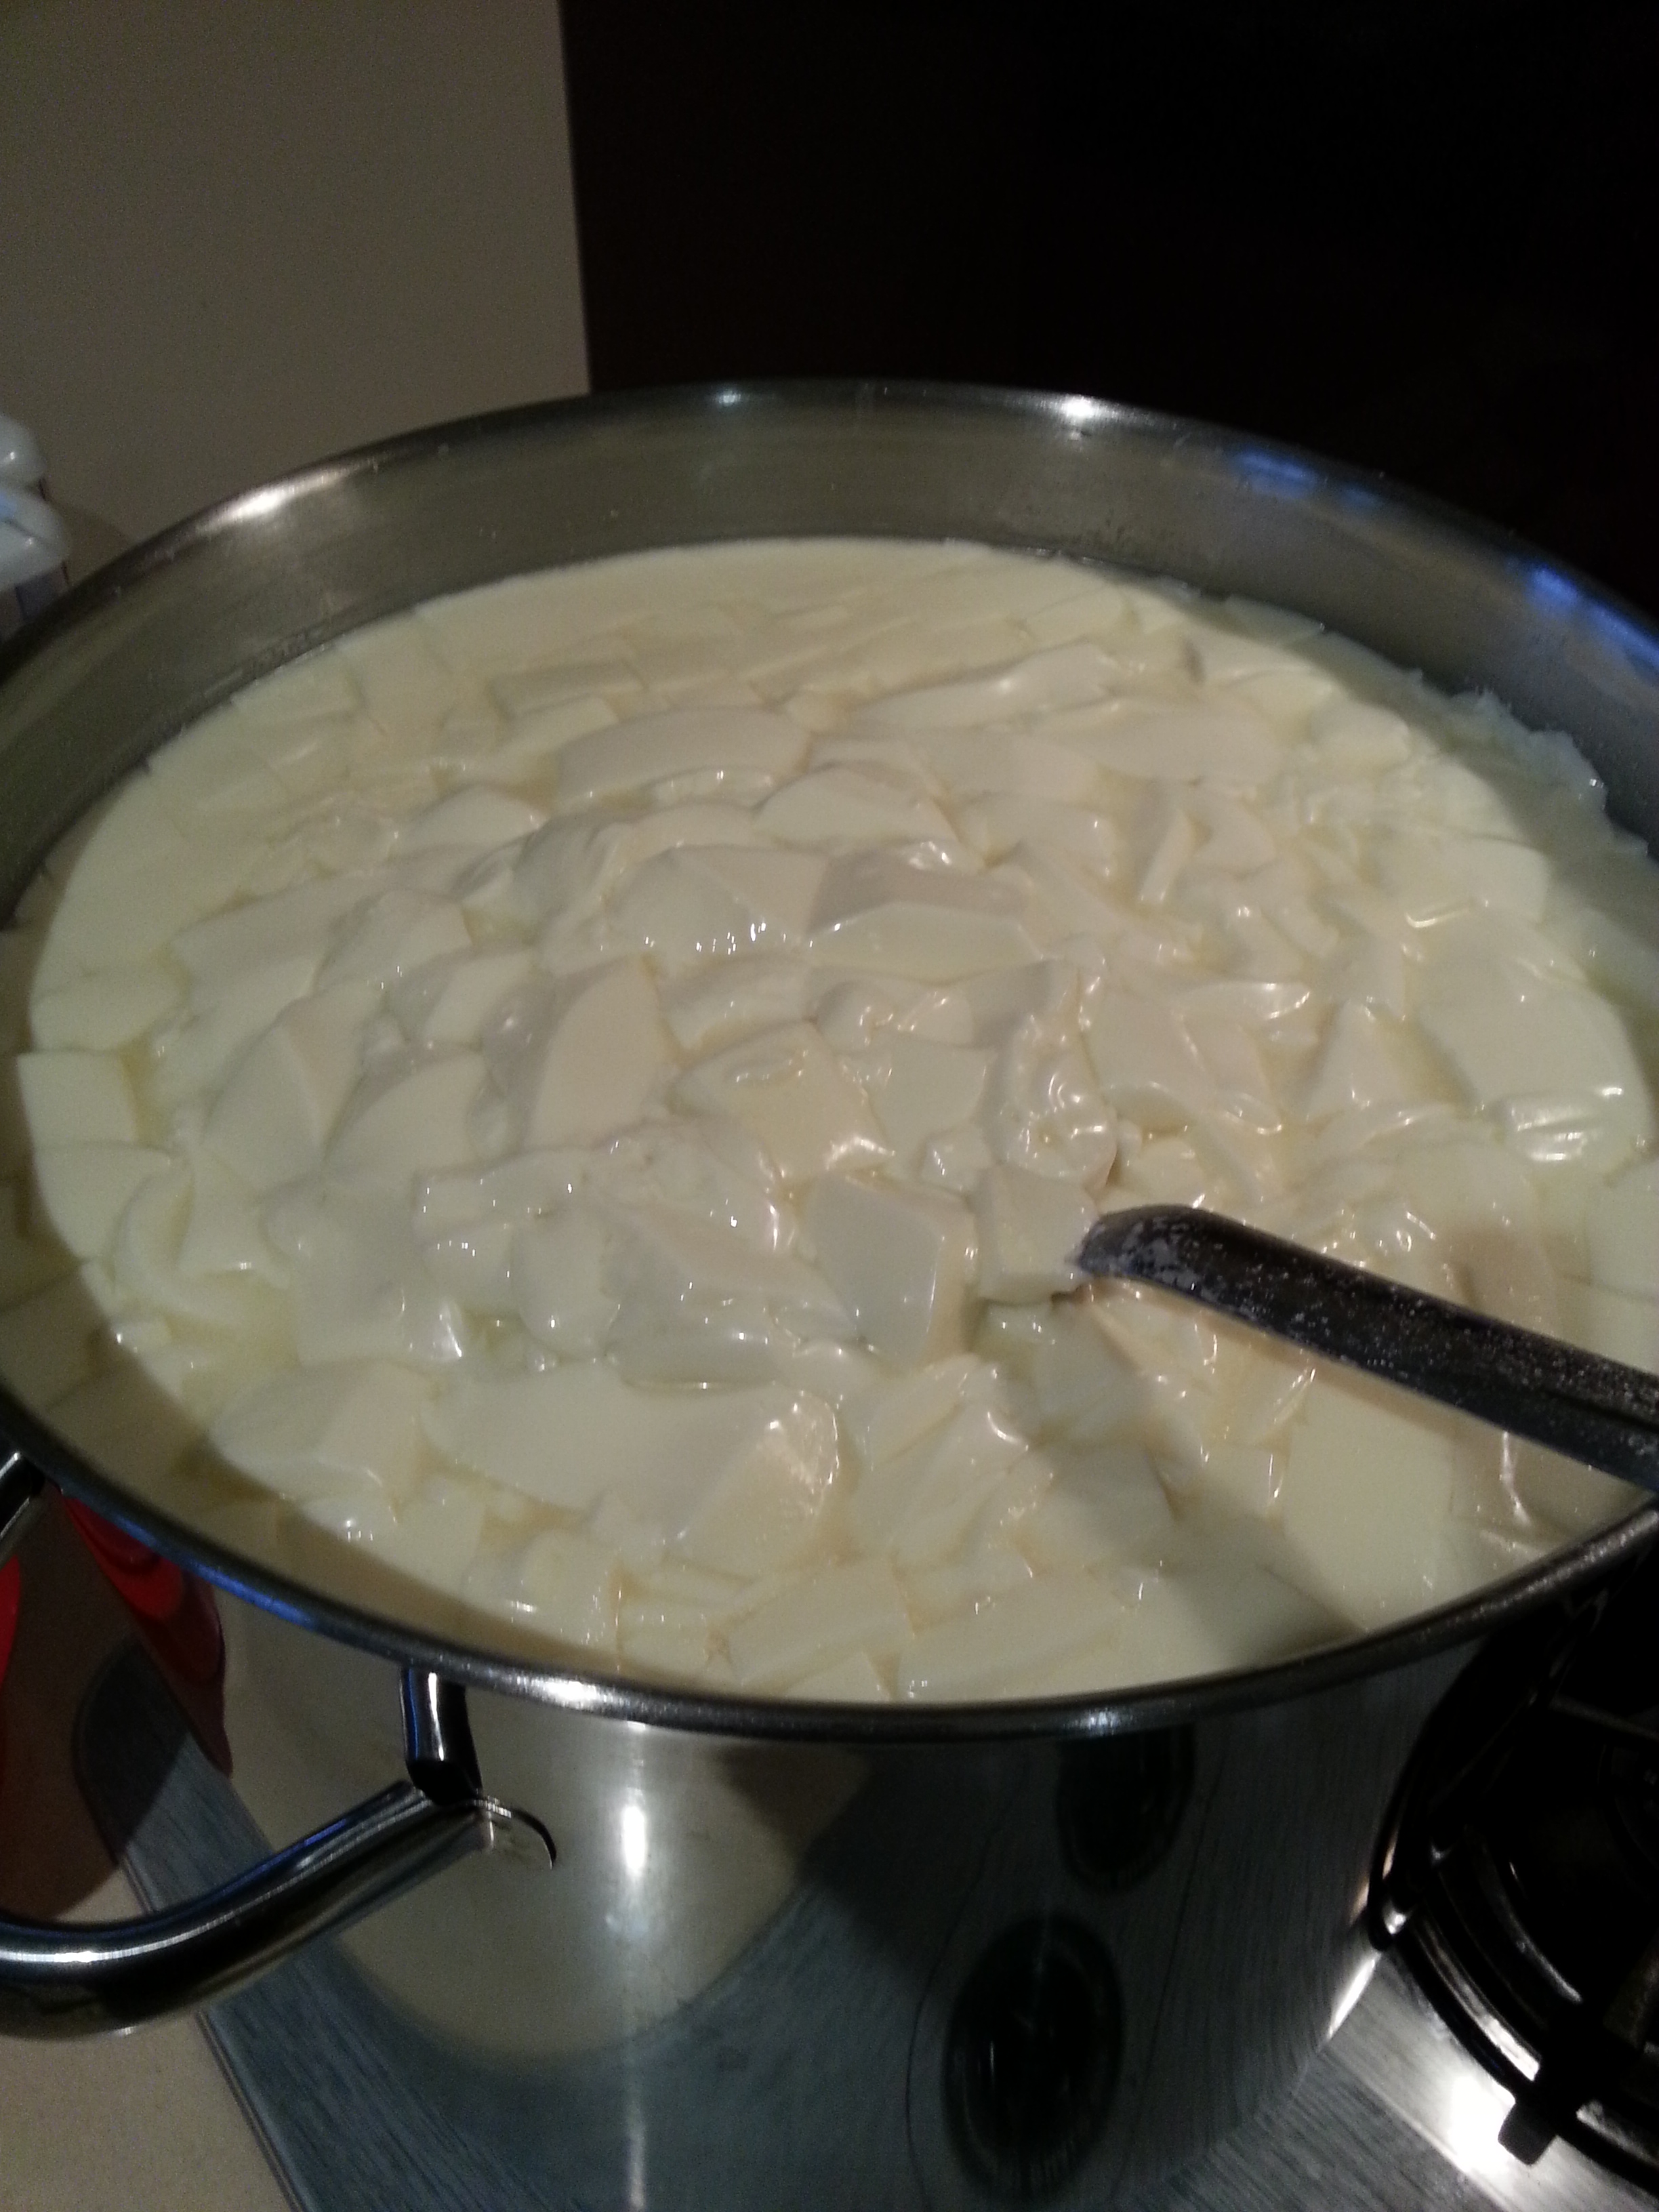
Once you get a clean break, you can now cut the curd. Cutting the curd increases the surface area of the curd causing it to release whey faster. As they release whey, they get smaller. The idea is to cut them in cubes or close to cubes about 1 cm cube will do for this cheese. You need a knife that can go all the way to the bottom of the boiler.
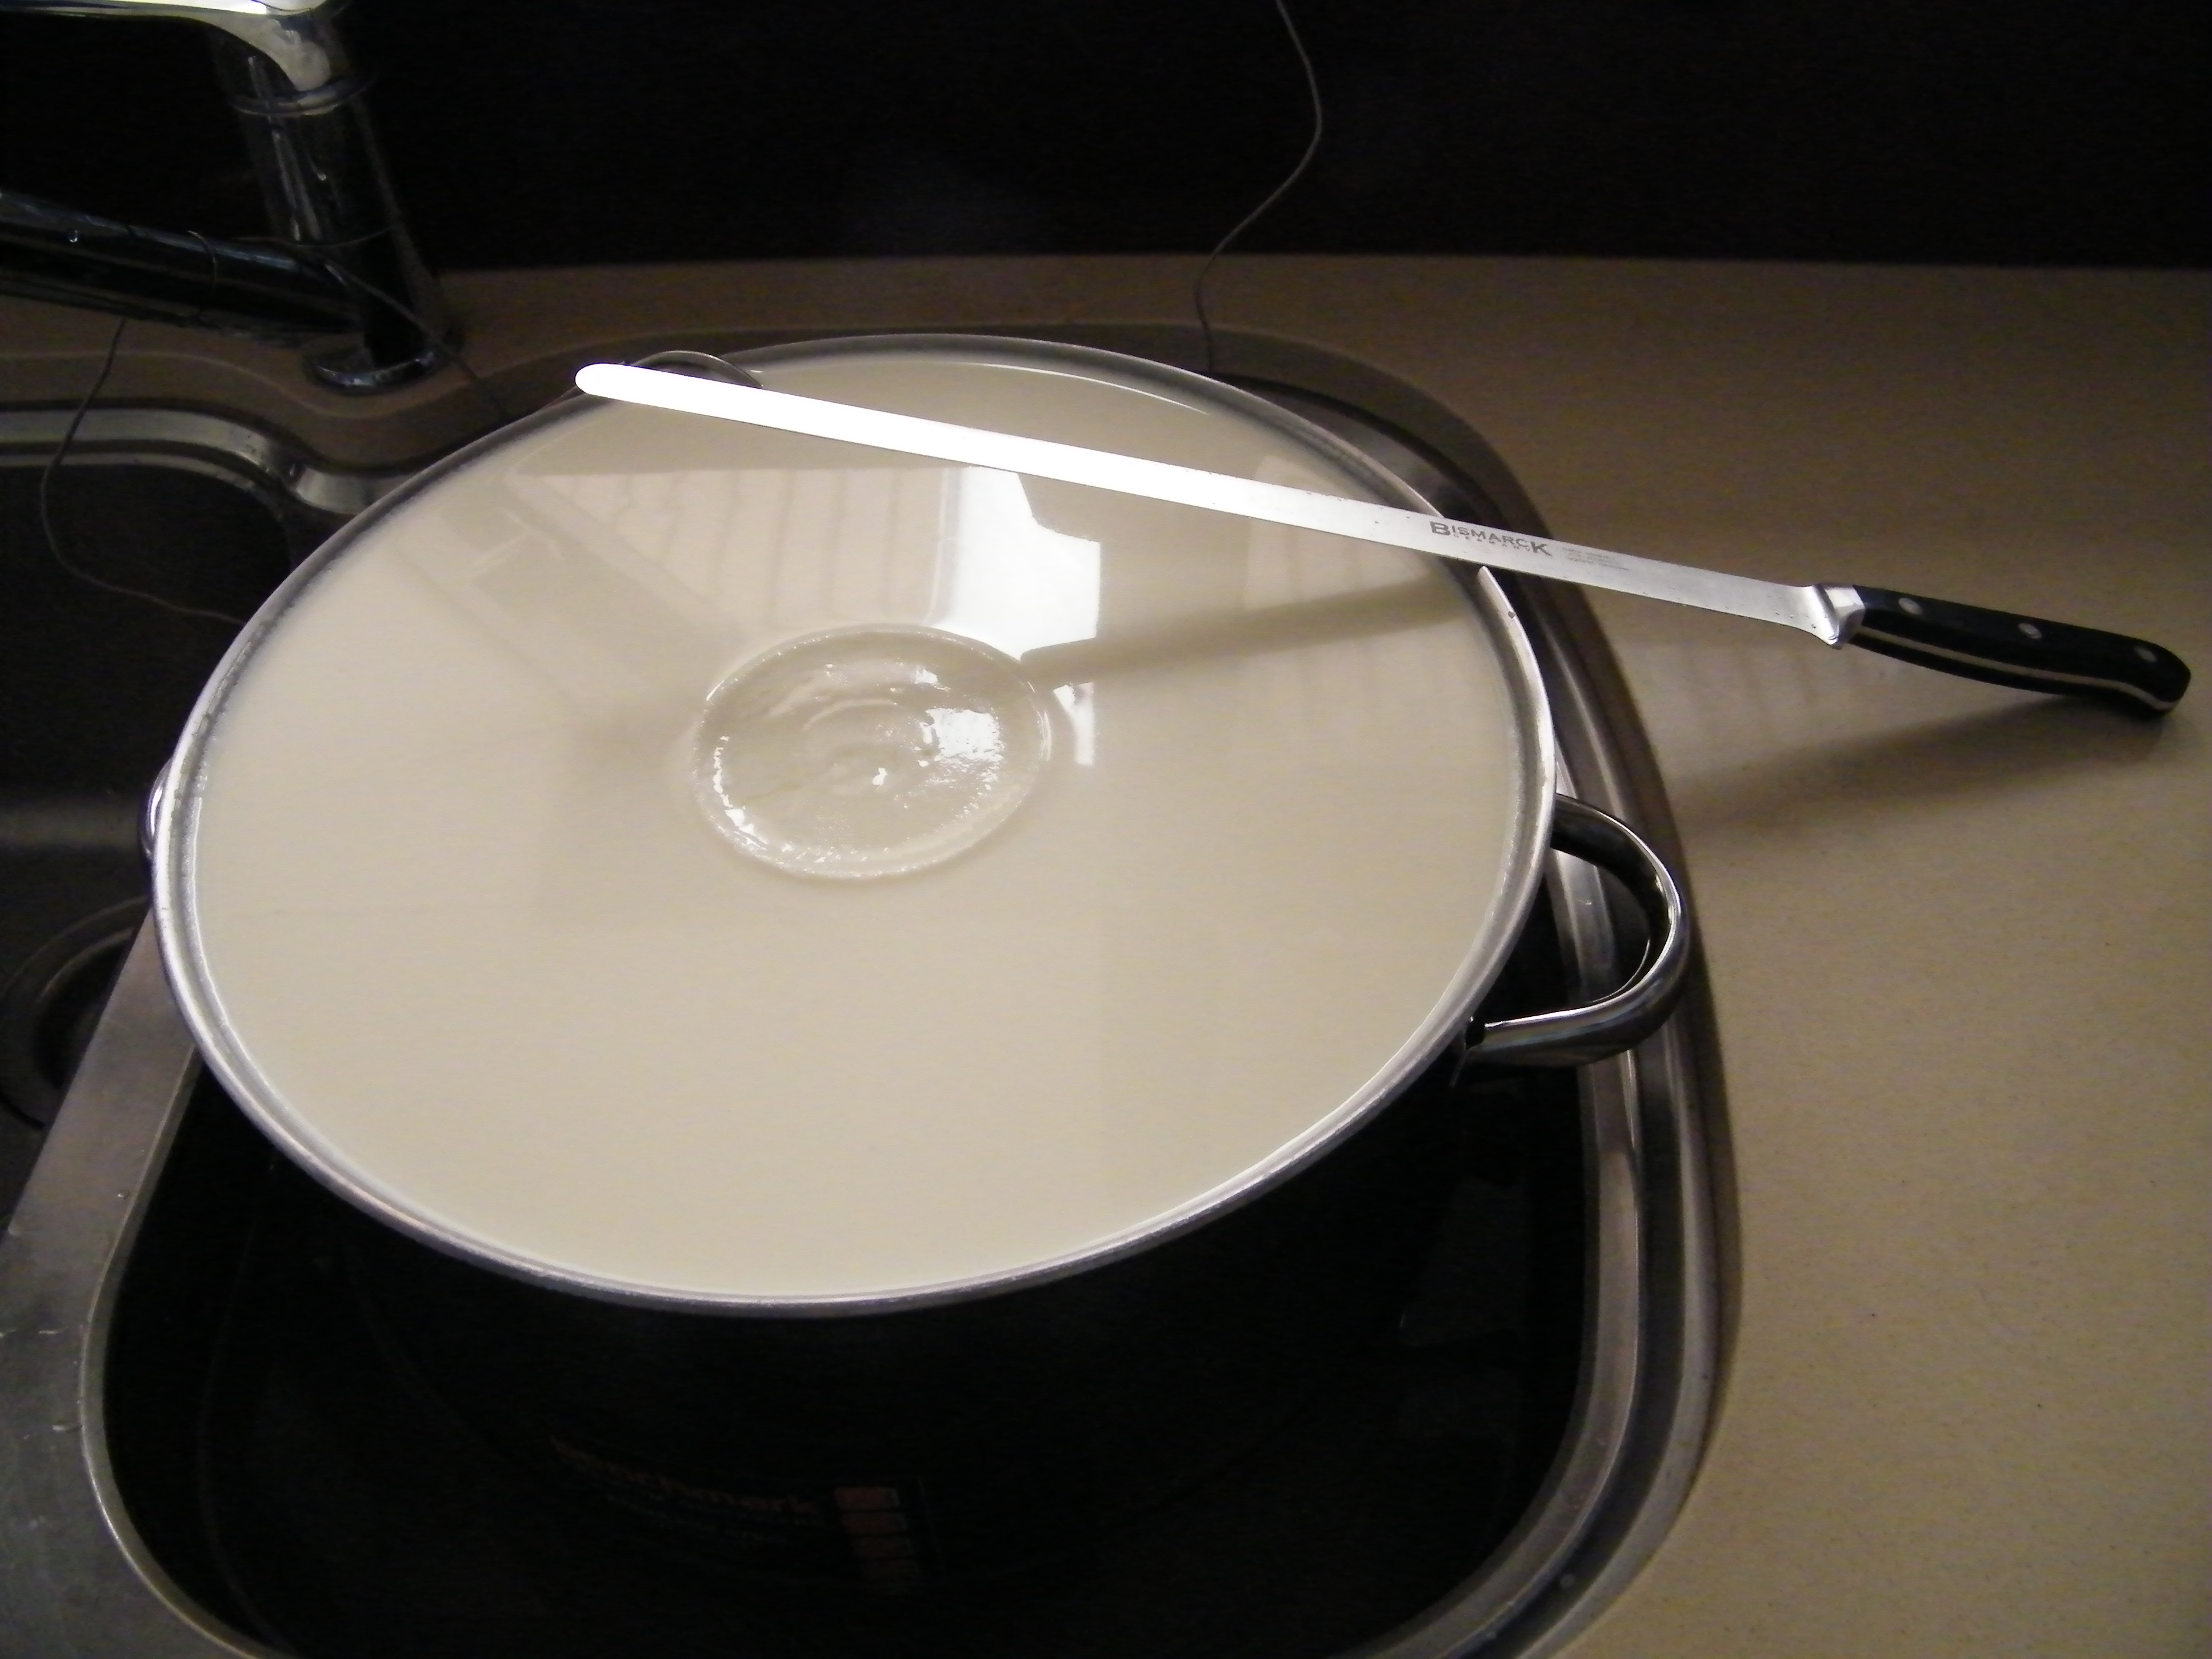
Put the knife in the middle of the boiler all the way to the bottom and draw in a straight line. Remove and move 1 cm to the side and do the same.

Once you finish cutting on way, turn the boiler 90 degrees and do the same cutting.

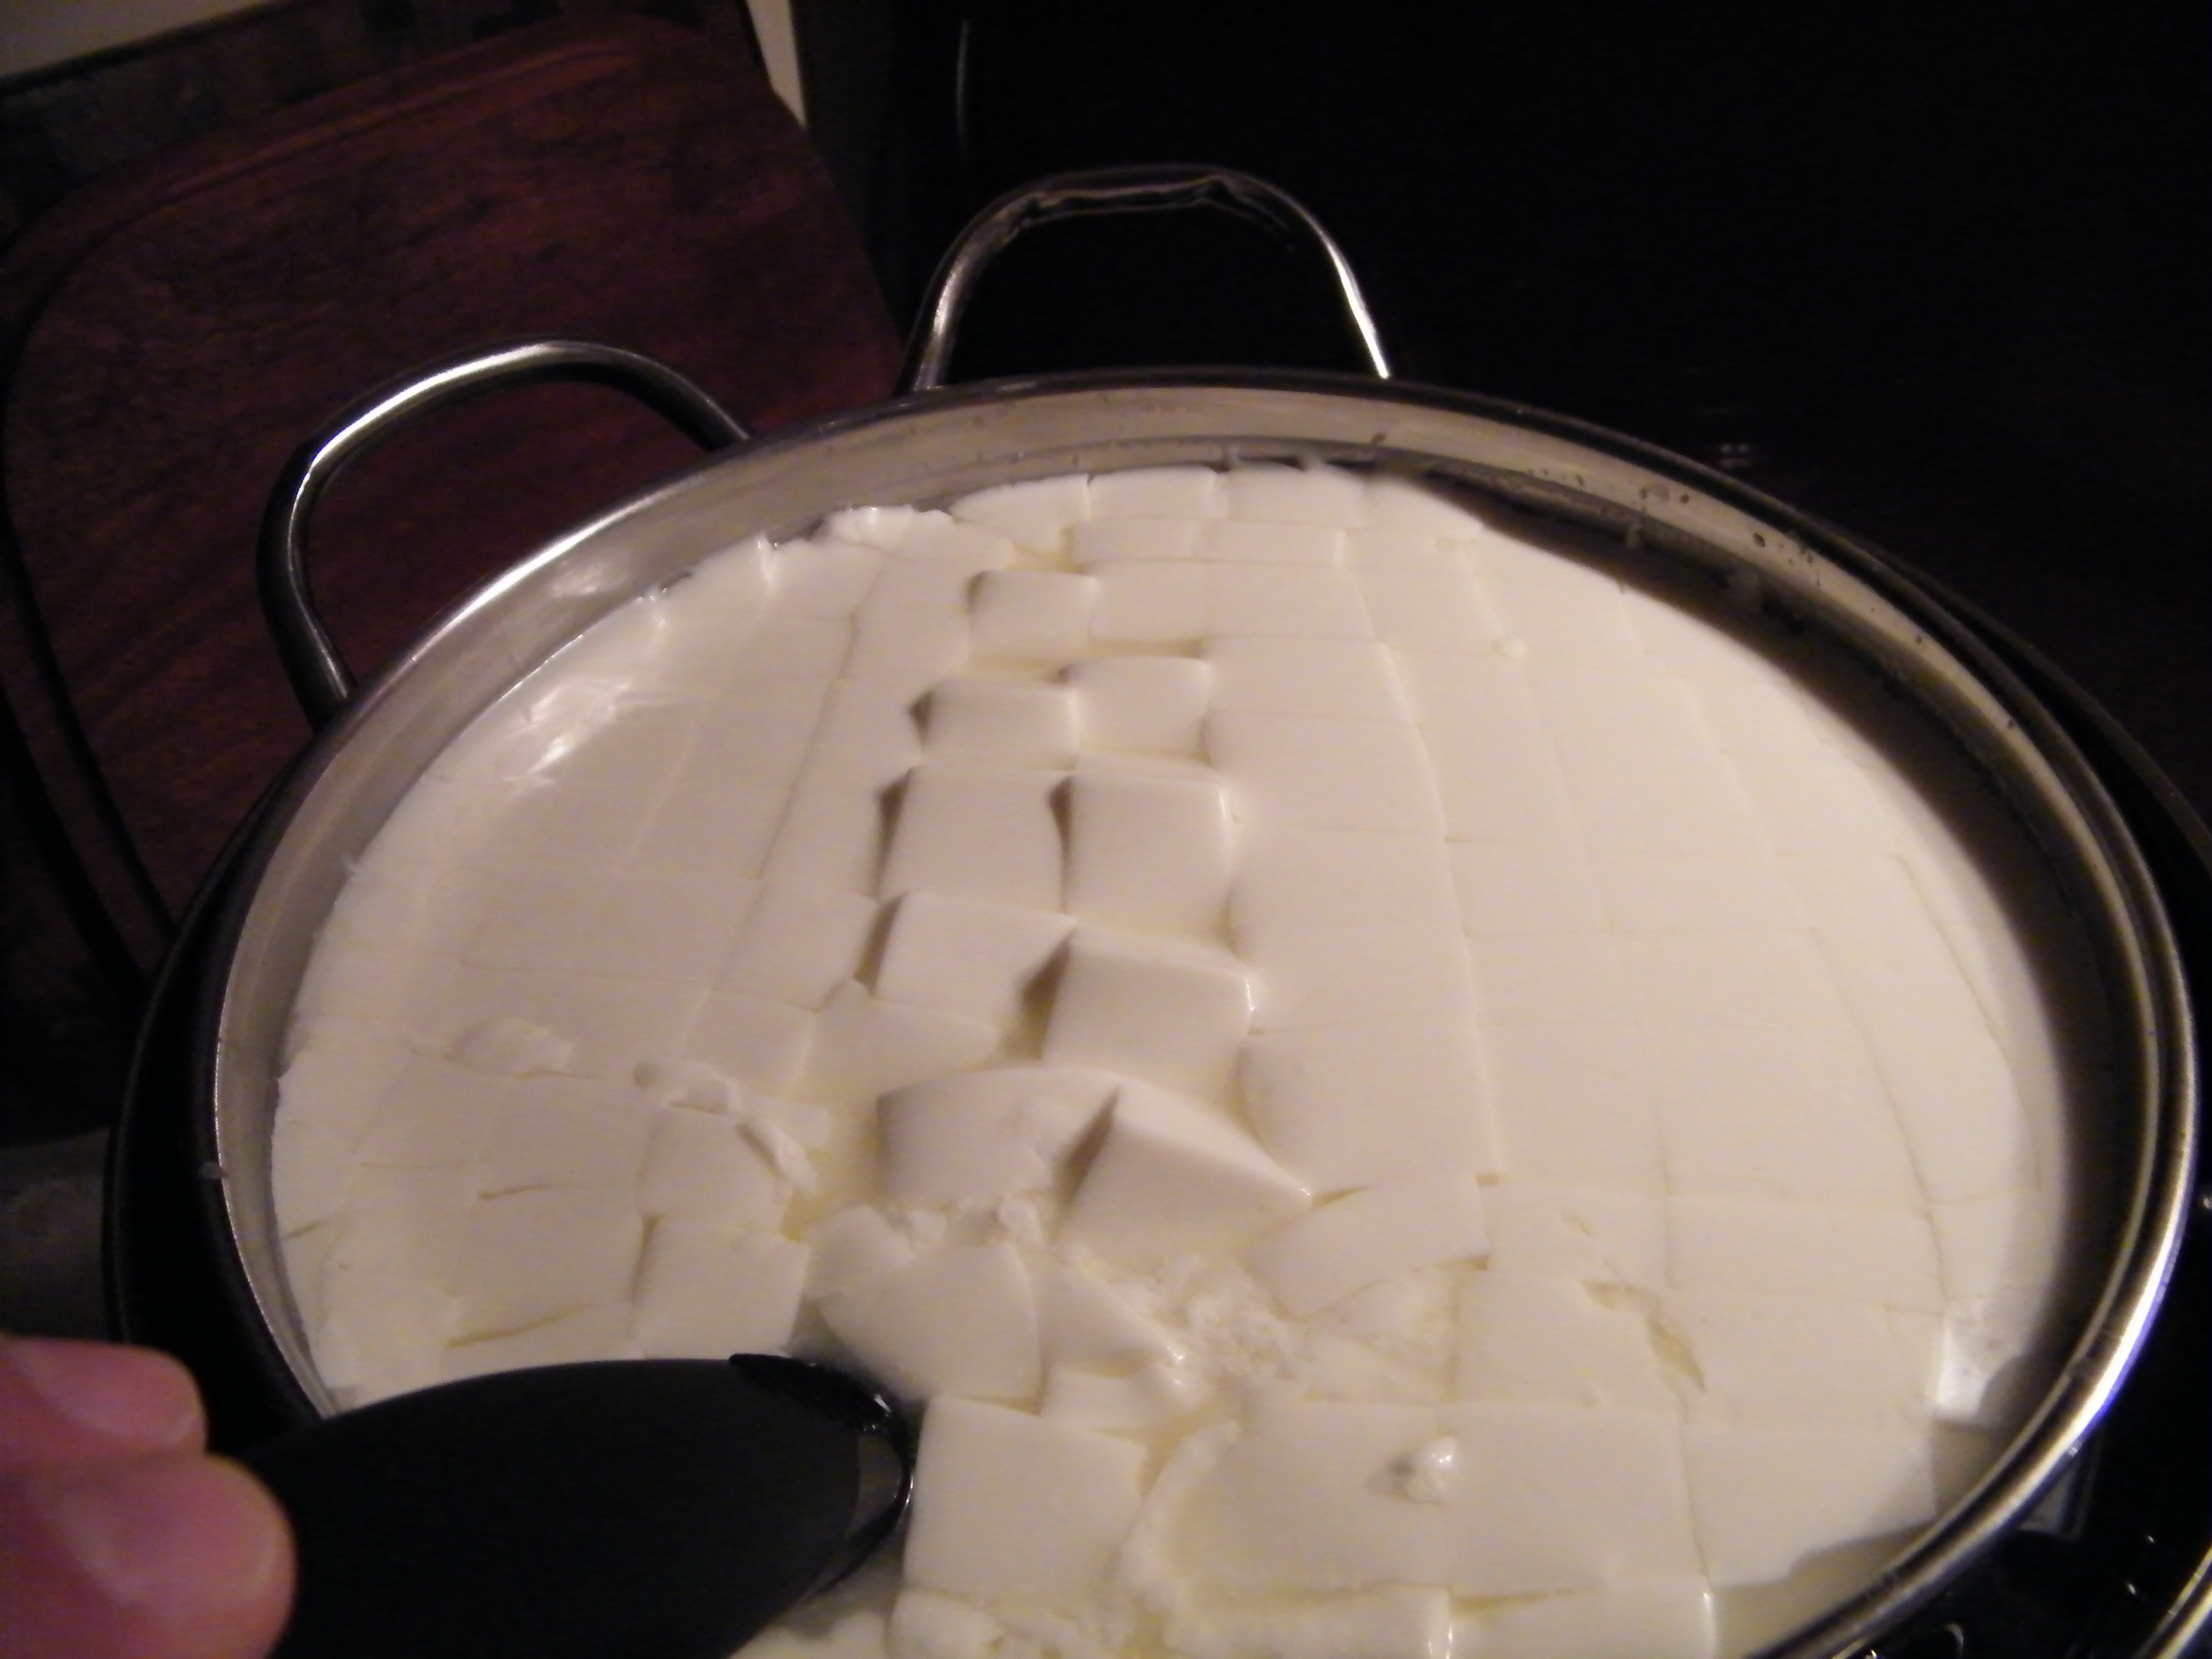
When you finish you will have 1 cm thick strips to the bottom of the boiler. Get your slotted spoon and try to break them at 1 cm intervals.
The slotted spoon should be a one piece metal spoon to prevent getting the bacteria in between the handle and the spoon’s metal part. Break the curds into 1 cm pieces and do not bash them around too much as we want to preserve the milk fats in the curd. If you handle them too much, the milk fat will be released resulting less aroma compounds in your final cheese.
Once sufficiently broken, let it heal for 10 minutes. The temperature still the same. After 10 minutes stir it once every 15 minutes 4 times.
At the end, the curd pieces will be shrunken and whey separated a lot. As almost 80% of milk is water, there are more water then the curds.
Transfer the curds into colander lined with chux cloth. Wet the chux with vinegar and water to prevent the cheese sticking to it. Do not throw away the whey.
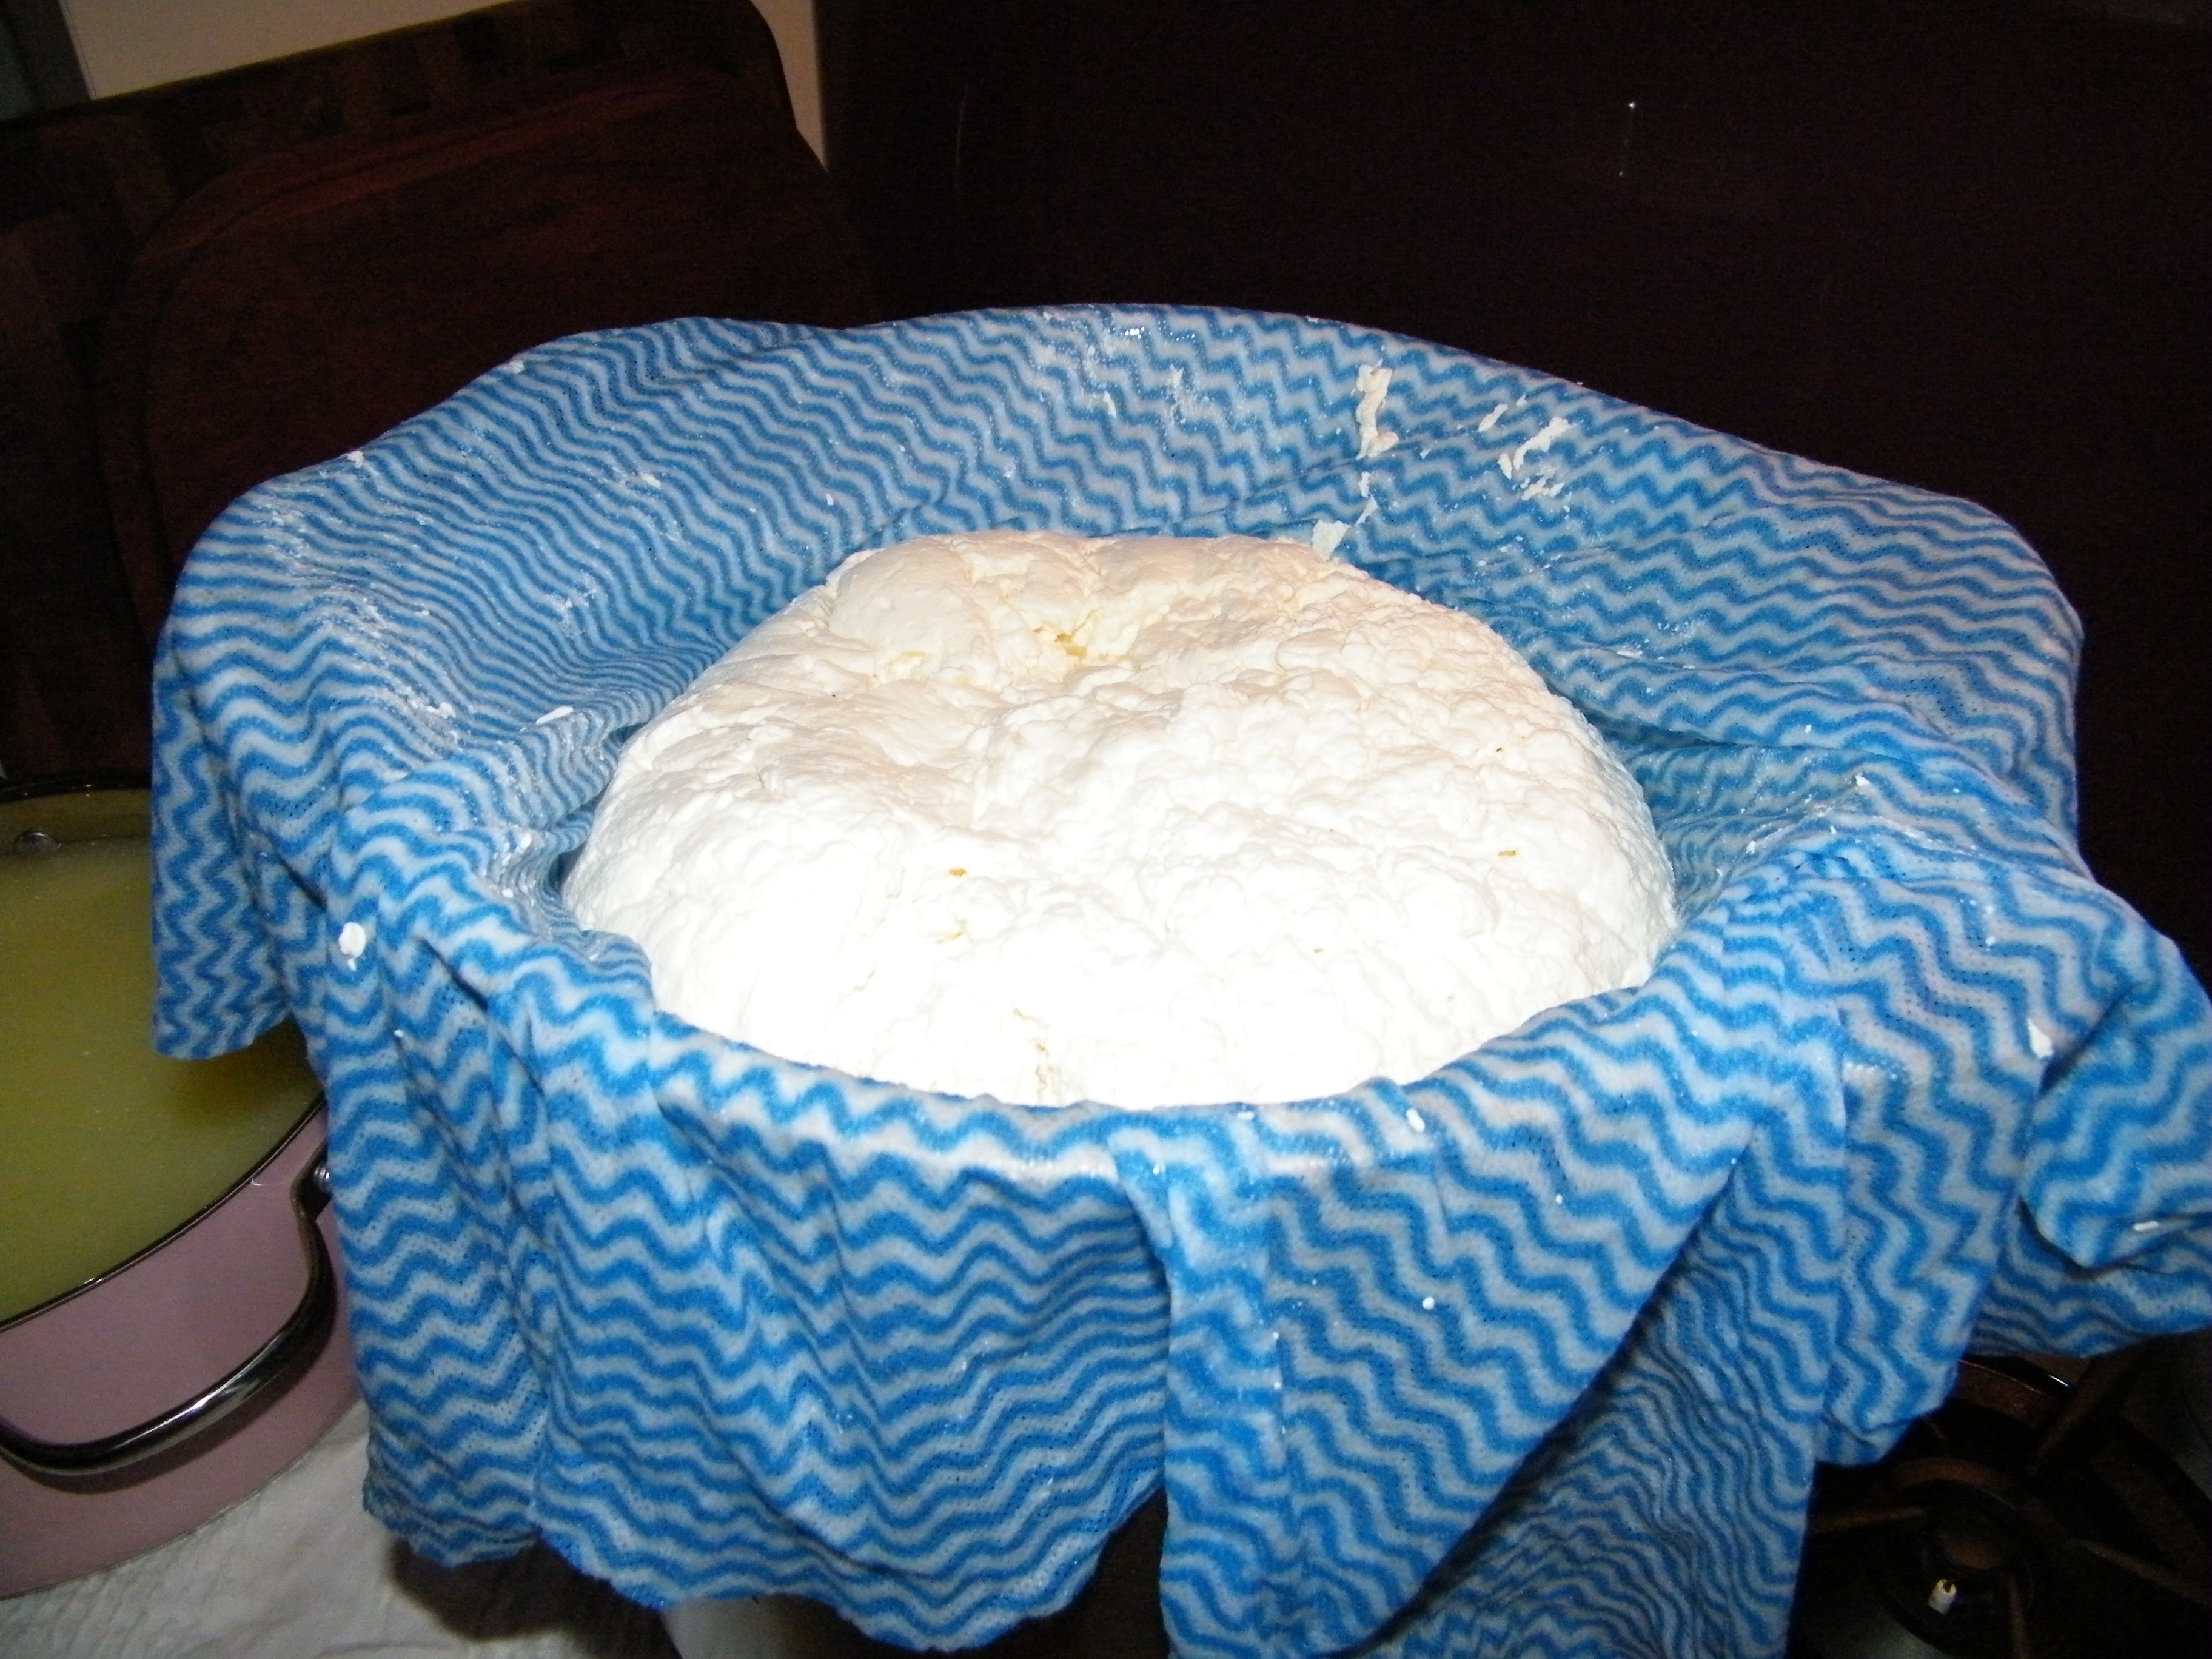
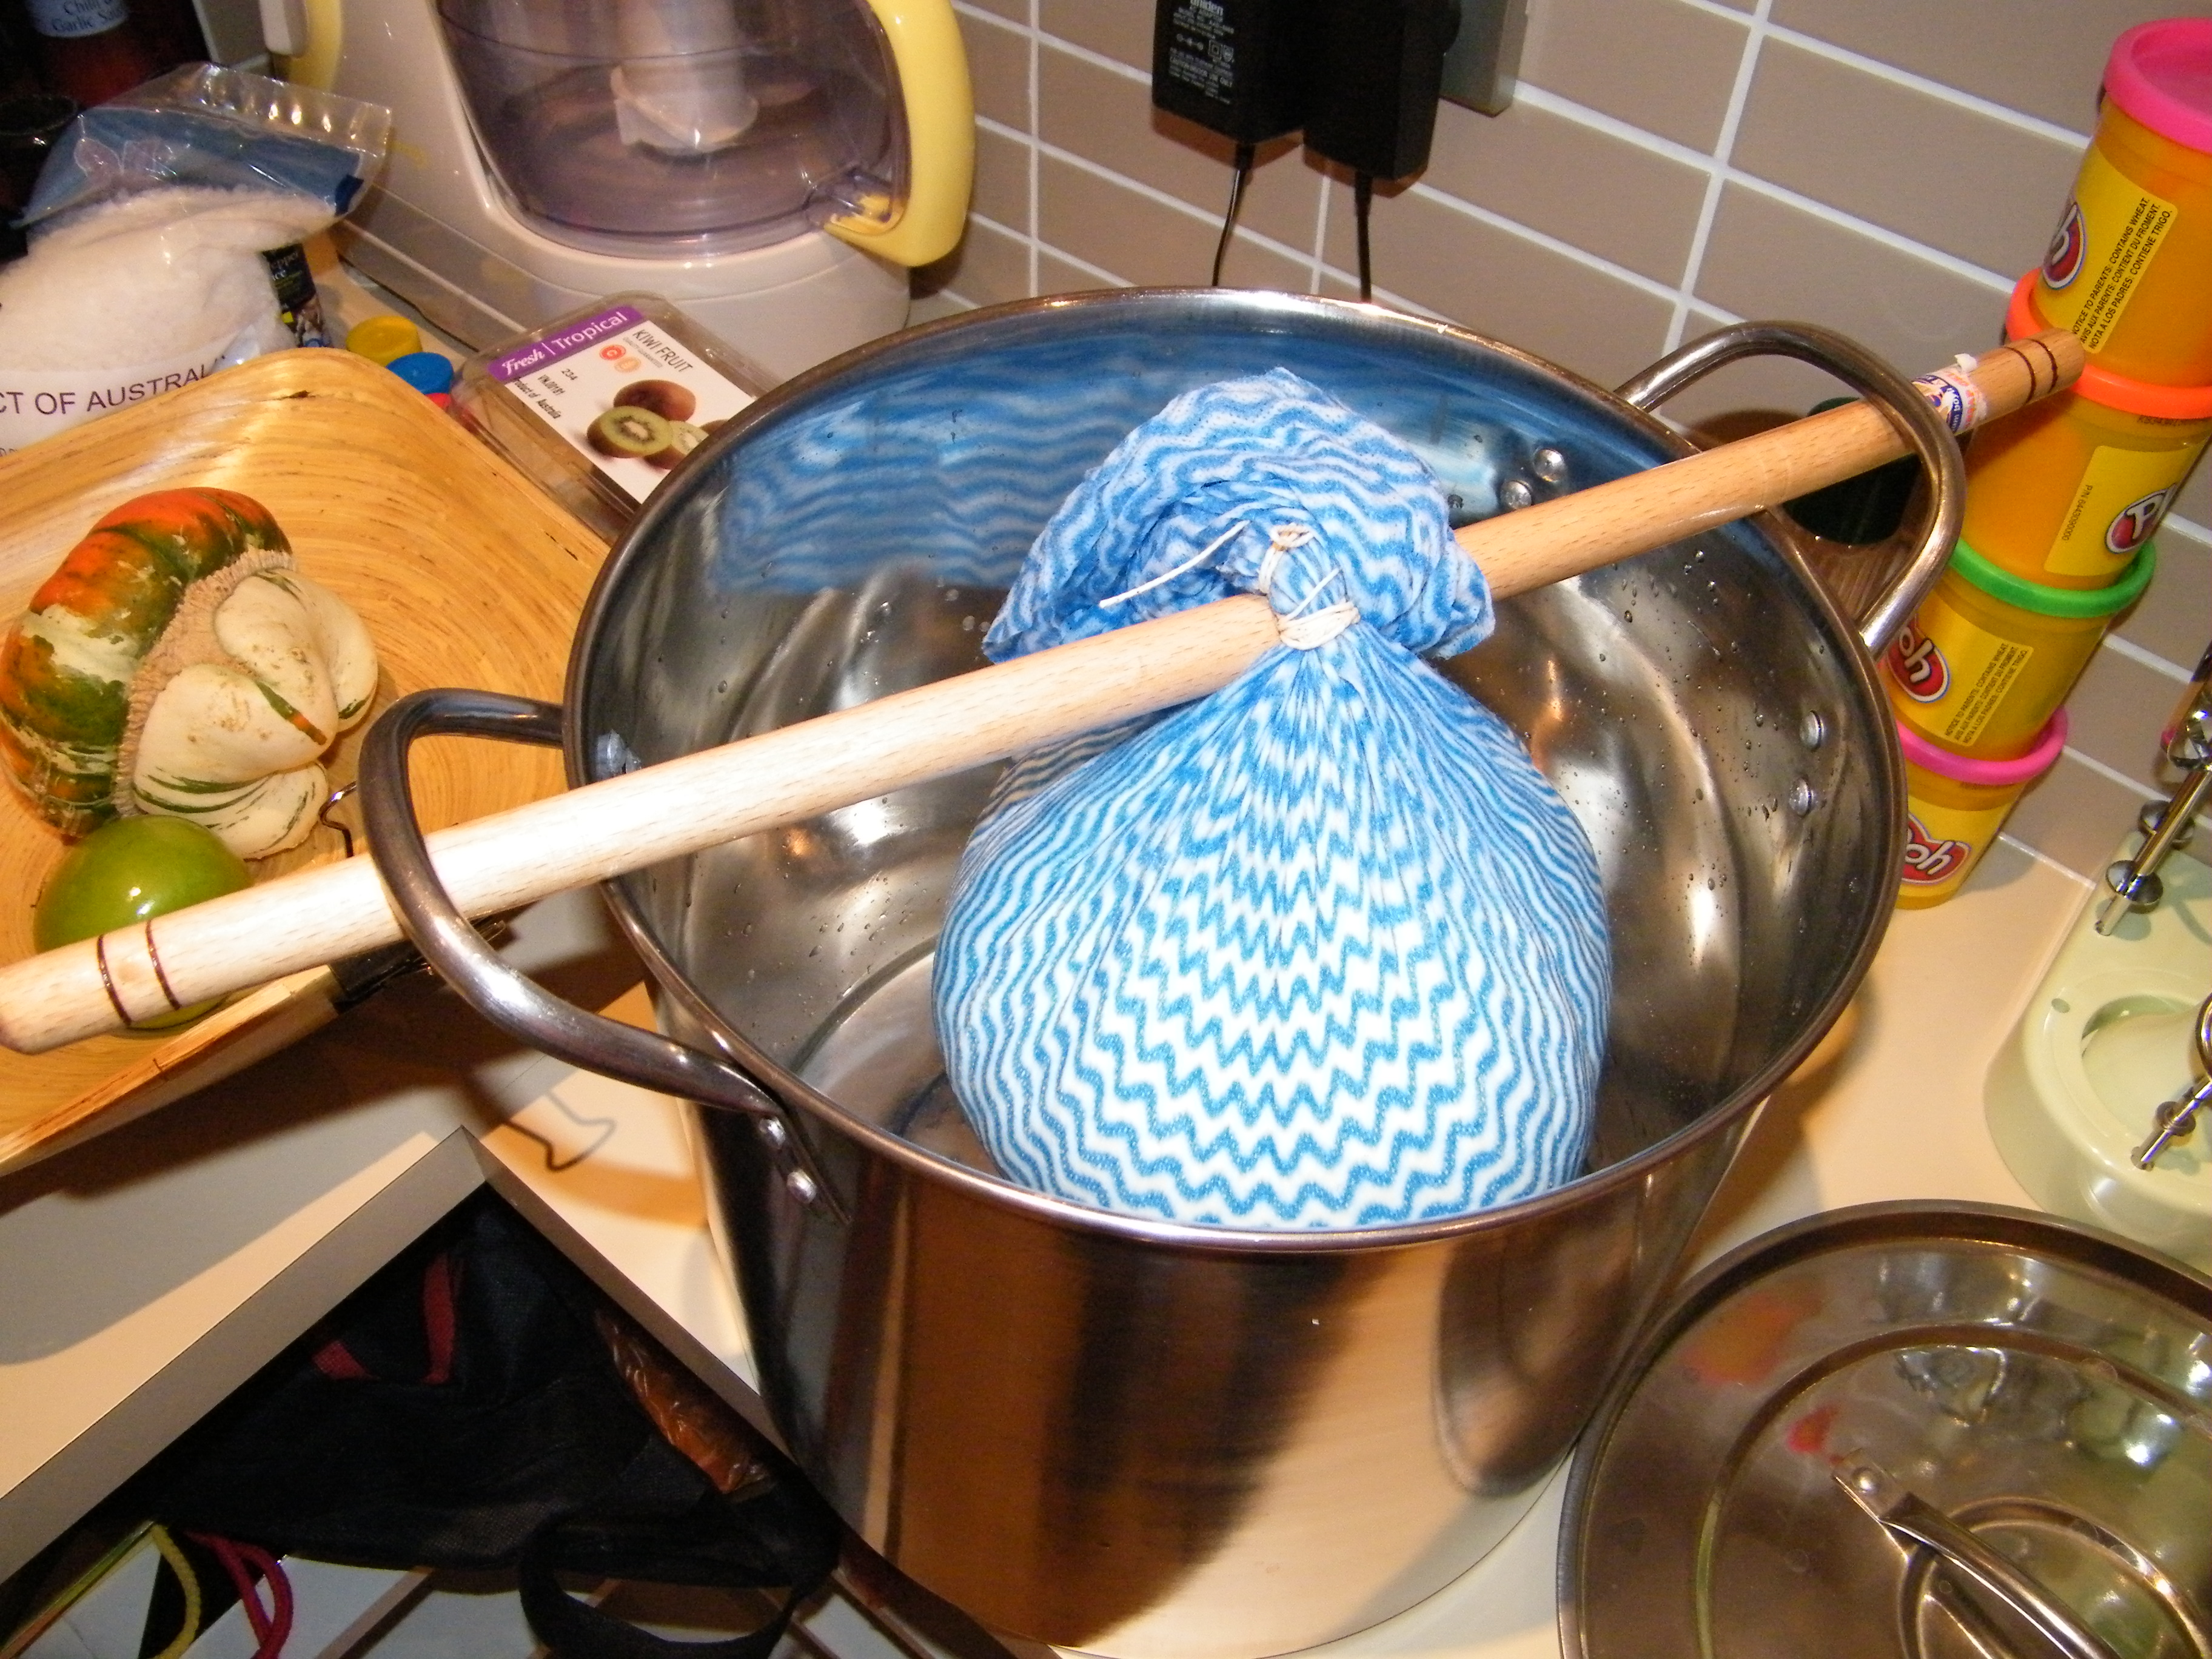
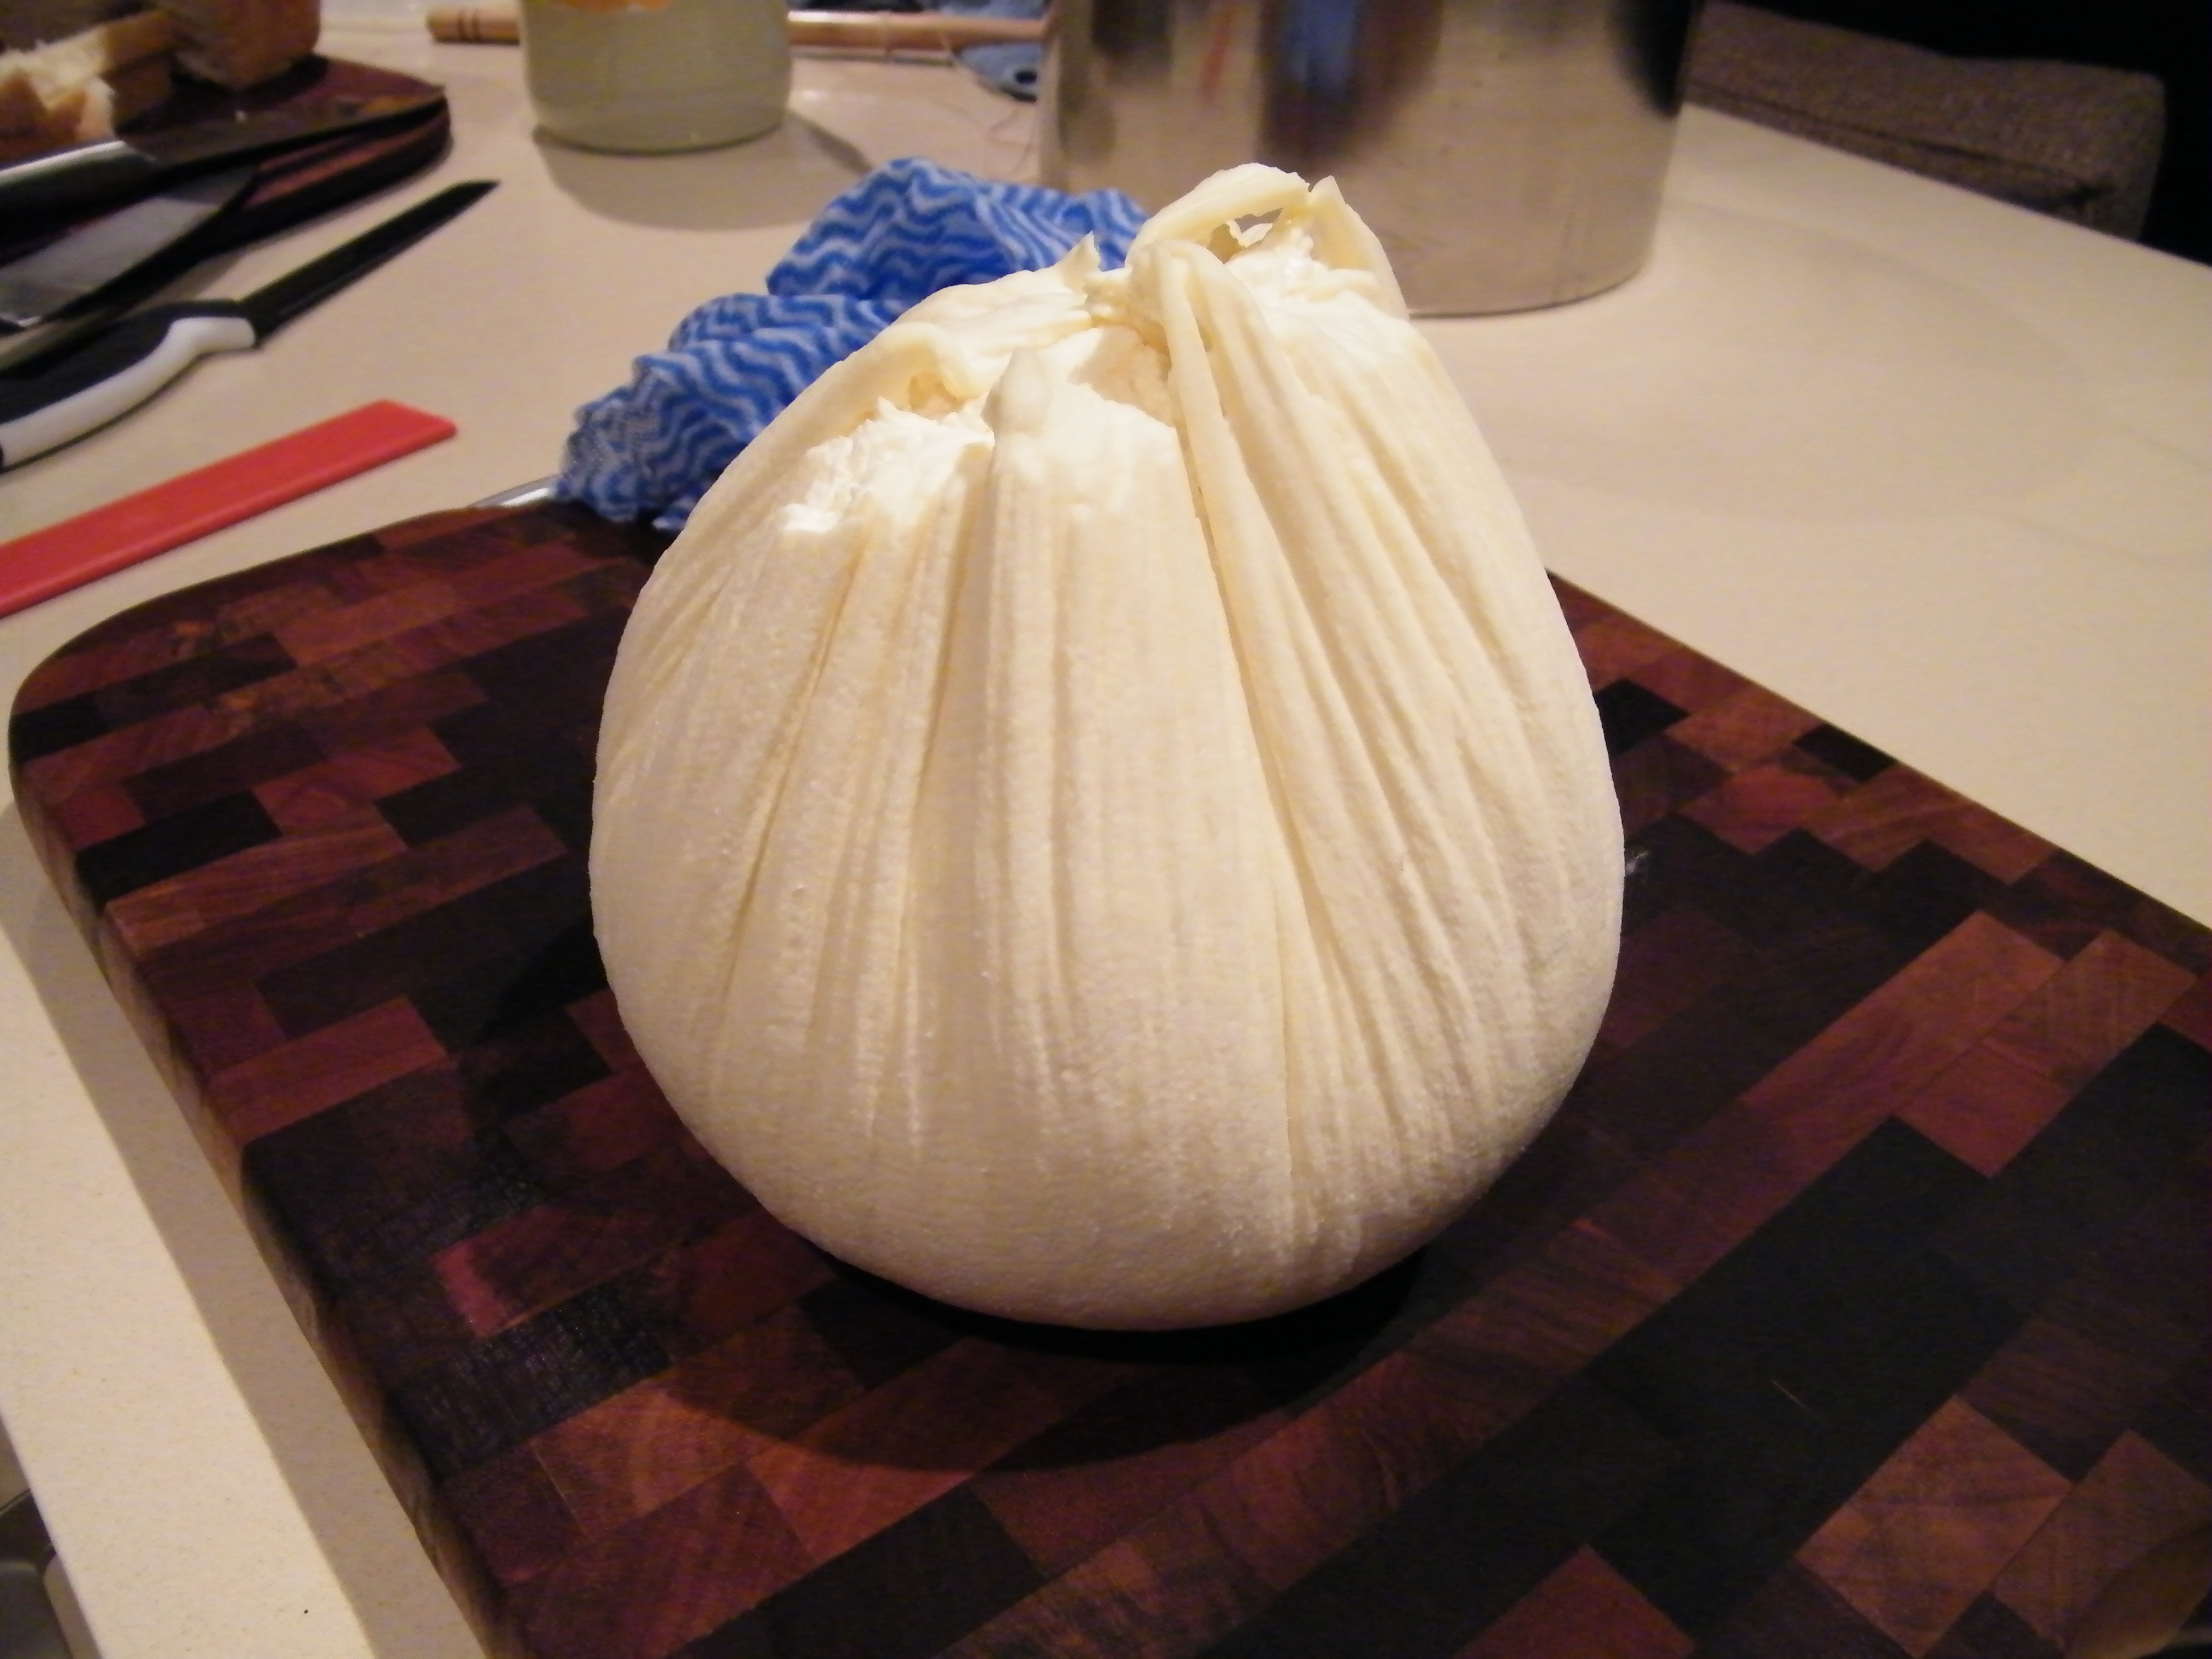
Drain the curds overnight or till the drops stop. I am using the boiler with a dough roller and tying the corners of the chux like a bag. Hang the chux inside the boiler so that dripping whey can be collected. Draining the curd has done at room temperature or colder.
Now the curd is nicely knitted and drained and can stand as a one solid piece on the cutting board.
While the cheese draining, we need to prepare the brine to store and age the cheese so that the flavor can develop. Take 900 g of whey and 100 g of salt. Stir and make sure all the salt is melted away. This is a 10% brine. You may reduce it down to 8% if you feel this is too salty on your second make. Add a quarter cup of white vinegar to increase the acidity so that your cheese does not melt in the whey. Cool your brine in the fridge.
Cut your cheese into pieces and place in cold brine. Check once everyday for the signs of melting. The cheese may go slimy in the brine, which is not good. Still edible but not to its perfection. It should keep its shape. Add more vinegar if you see slimy skin on the cheese. If everything is going okay, in about 2 weeks time, it should suck up enough salt and develop some flavor.

Keep the container in the fridge. You can consume whenever you want. There are no rules. The longer you wait, the better aroma it gets.
I hope you have got an idea of what sort of equipment you need with this recipe.
Enjoy the cheese.